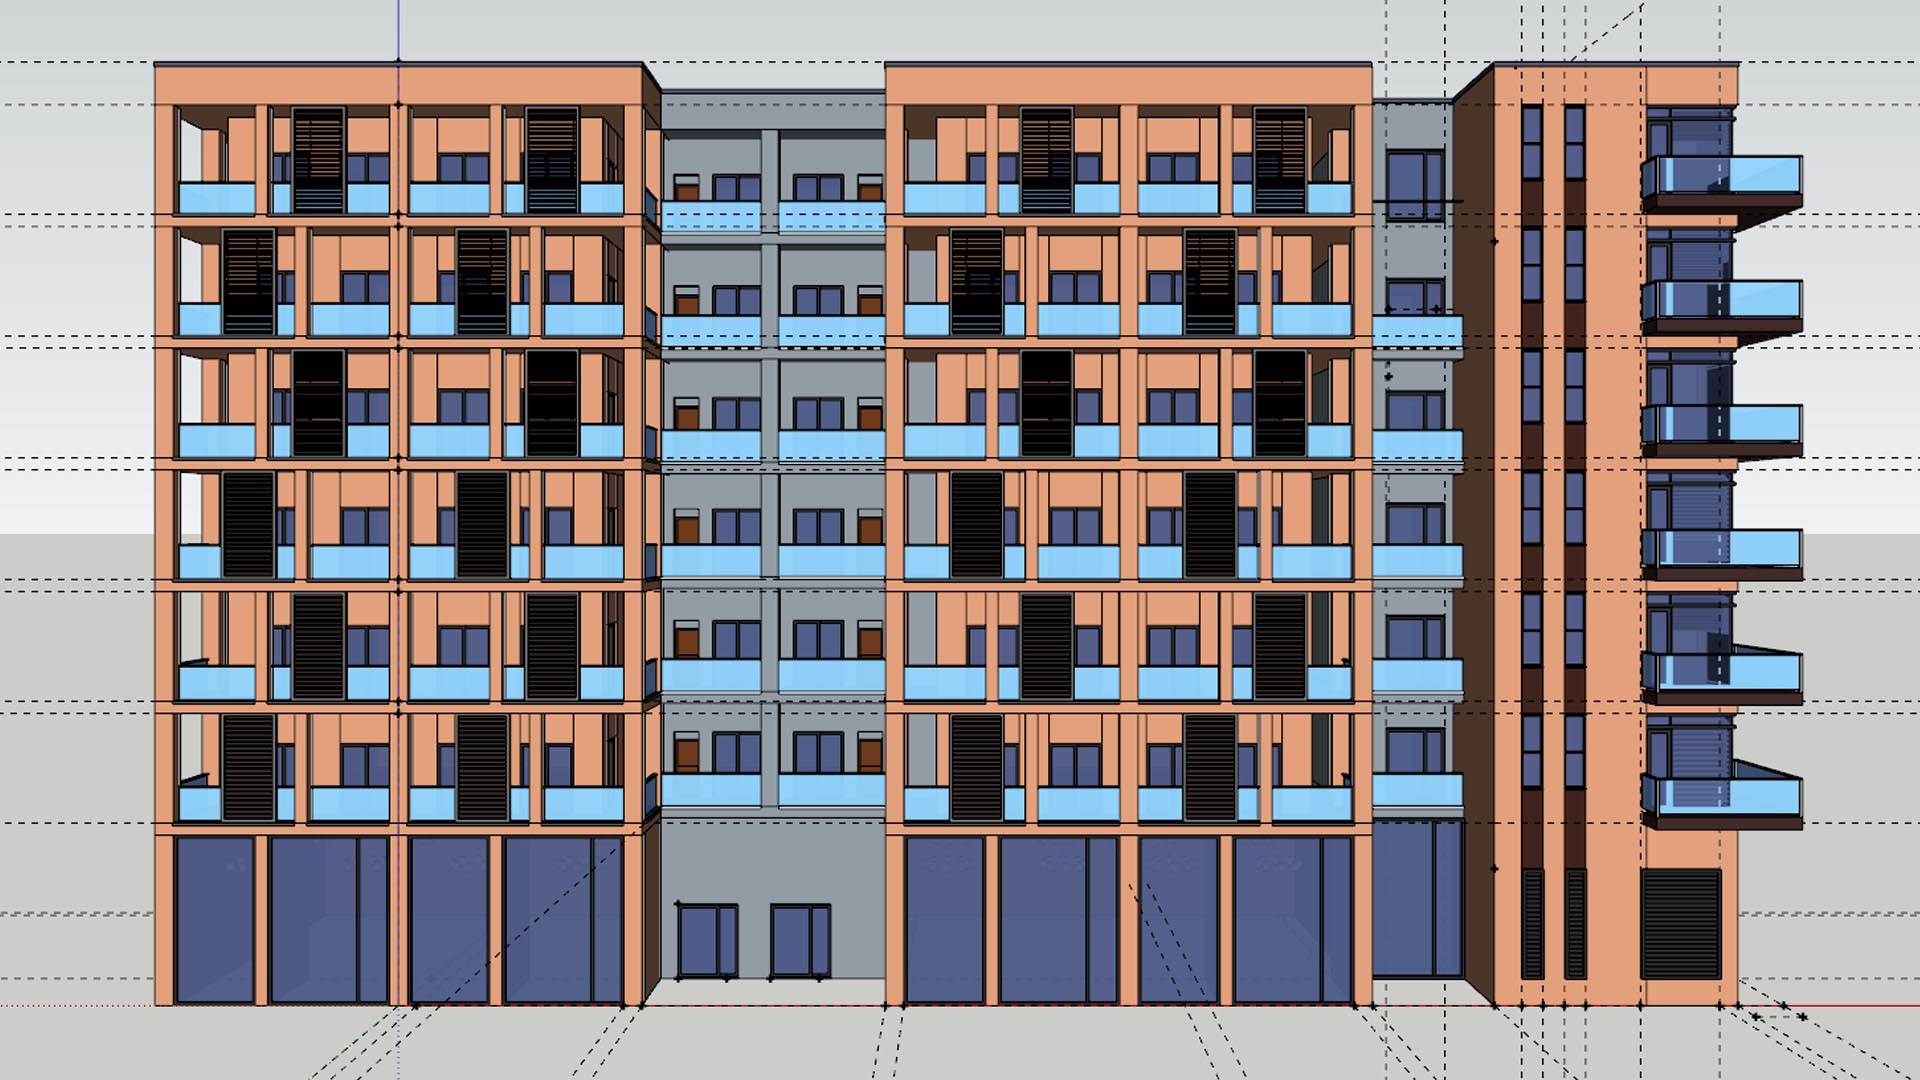
After you make 3D models by SketchUp or other softwares, let’s render by Twinmotion! Here I will show you about a workflow from first-launch to output an image file.
Before reading this article, please install Twinmotion. (It is free until Nov. 2019!)
Importing Models
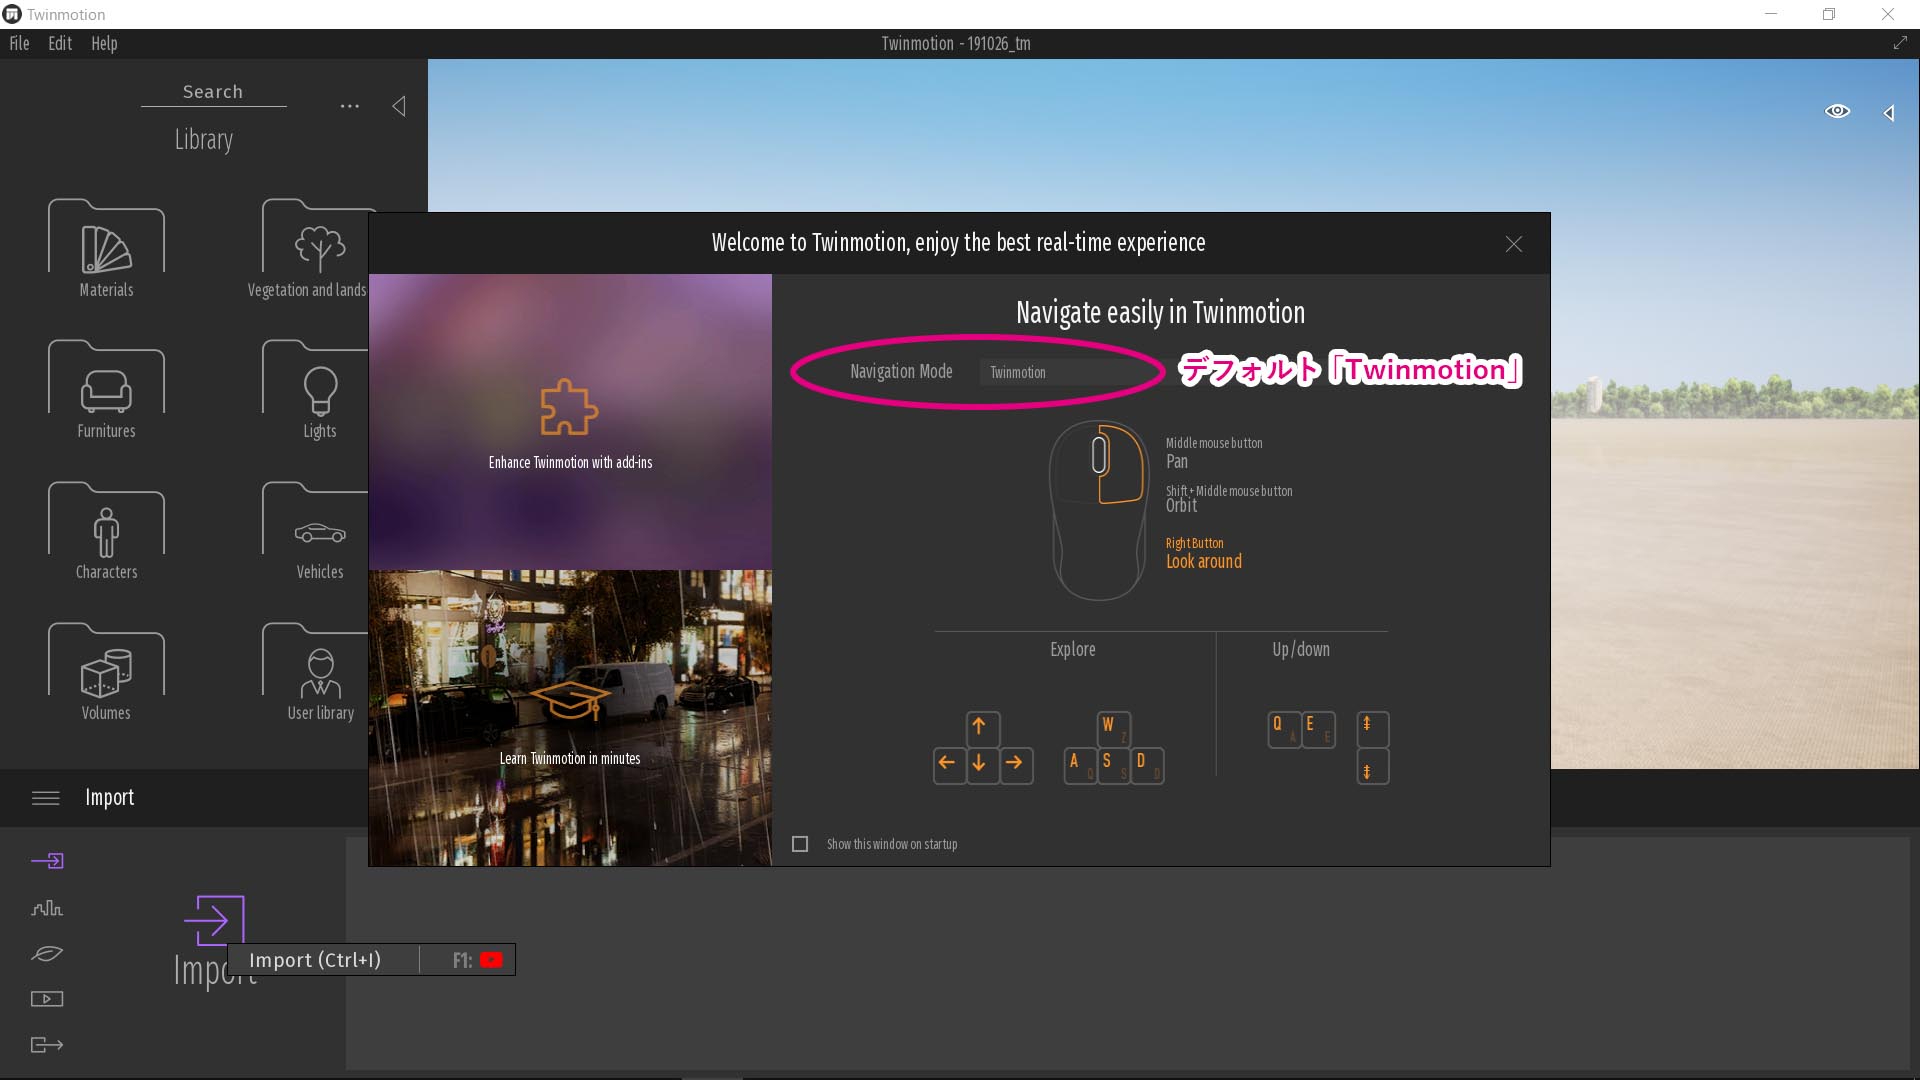
When you launch Twinmotion, at first a navigation window will be open. You can choose operation shortcuts for operating by close ways to 3D softwares you are using, but I always choose default setting “Twinmotion”. As you can see below, it is recommended to use a three-botton mouse, by which you can left-click, right-click, and middle-click.
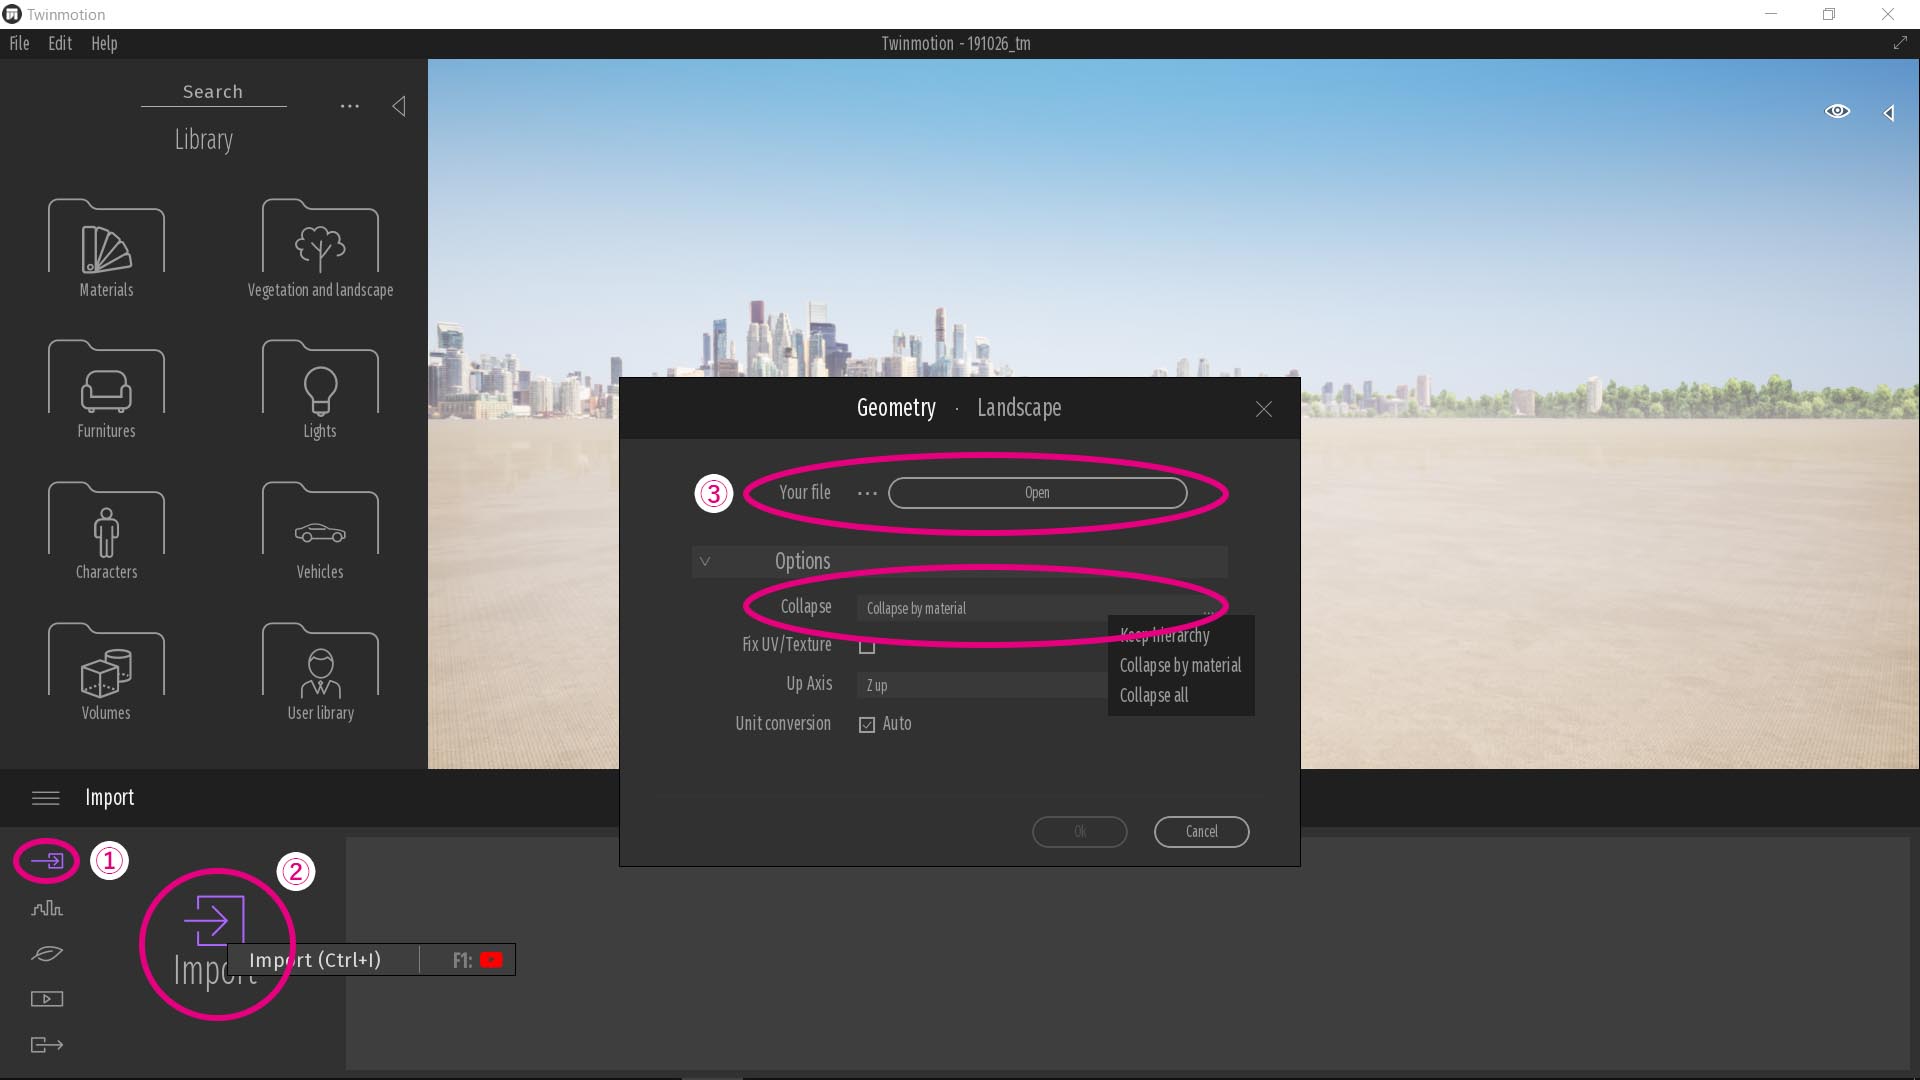
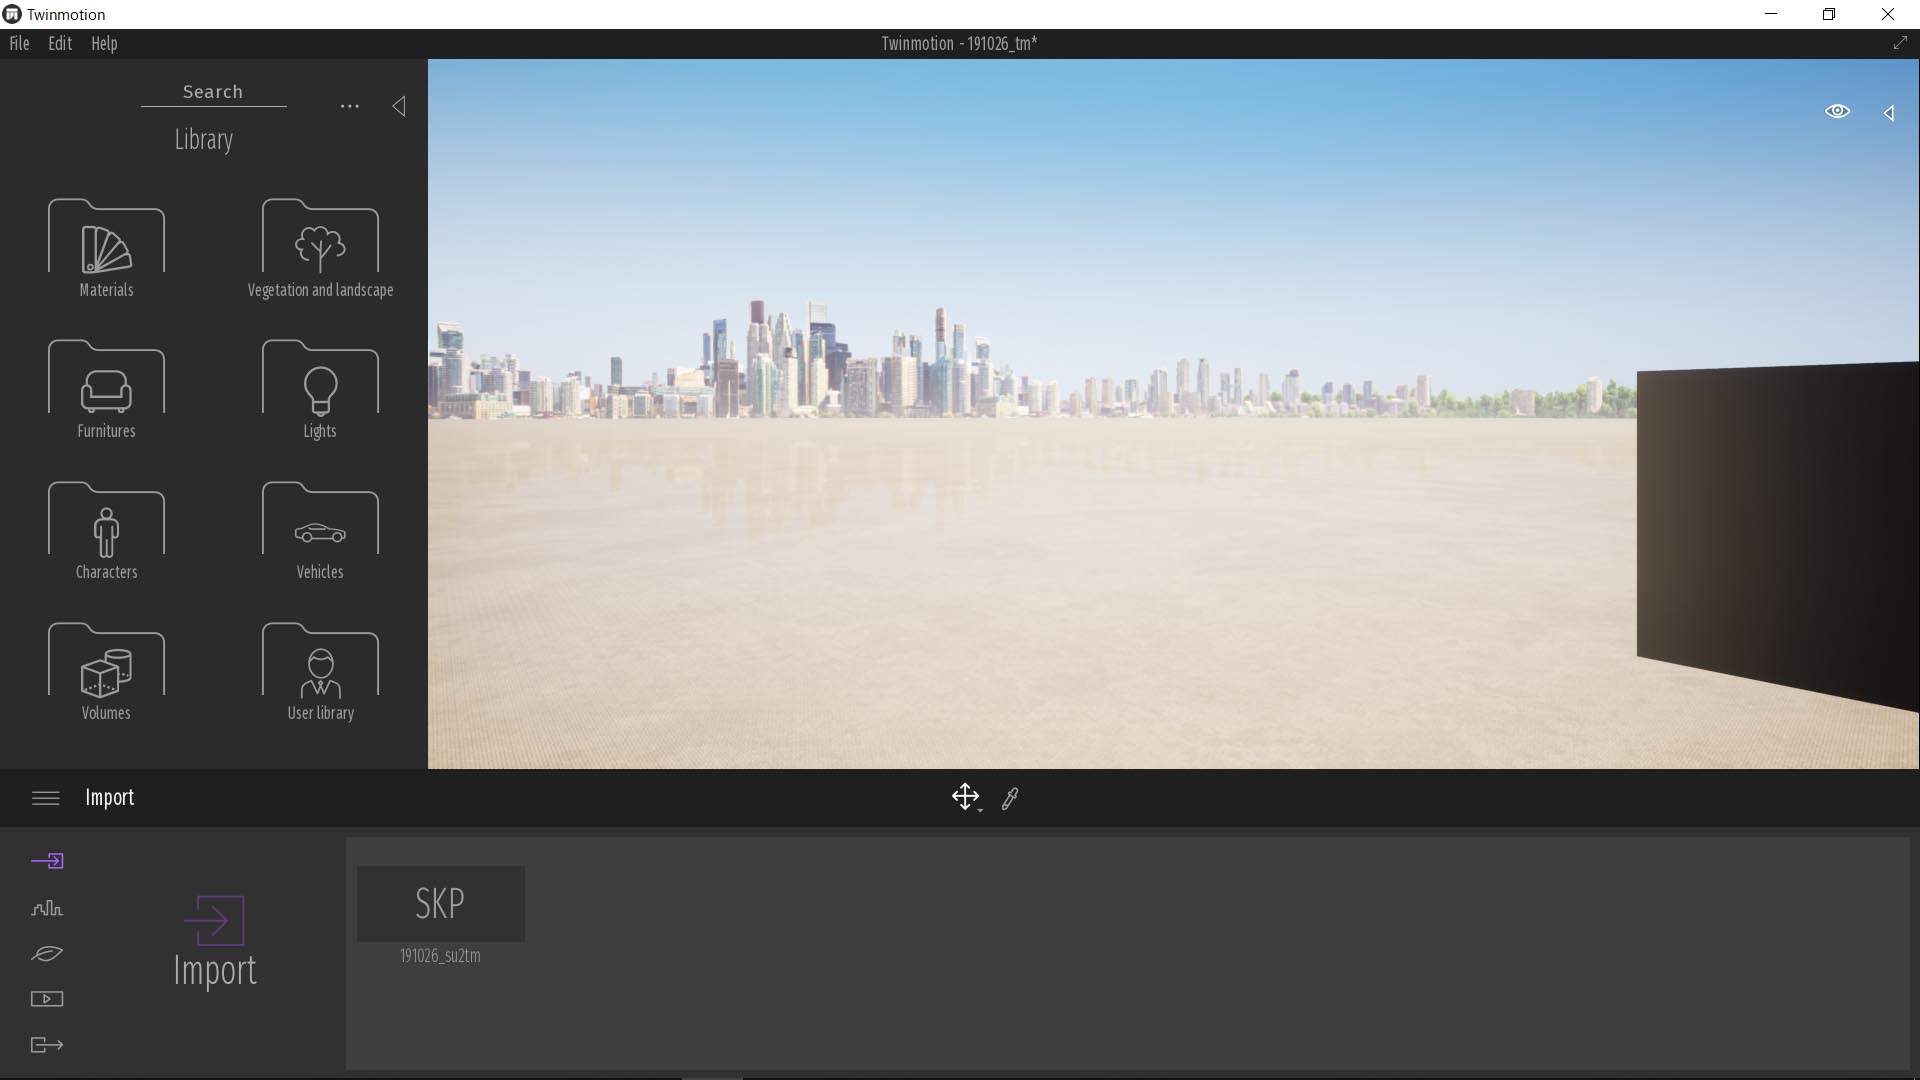
Next, click “Import” on the left-bottom. Or, short-cut is “Ctrl+i”. You can import .skp by SketchUp or other files. In this time, there are three choices in options, “Keep hierarchy”, “Collapse by material” and “Collapse all”. I will recommend to select a default setting “Collapse by material”.
- Keep hierarchy・・・Tree-construction is kept as you can see in “Outliner” in SketchUp.
- Collapse by material・・・Tree-construction is collapsed, and objects are merged by kinds of material. Further more, please see next article (not translated in English yet, Nov.09).
- Collapse all・・・All objects are merged to one object.
You may want to choose “Keep hierarchy”, but Twinmotion is a real-time rendering software, so it is not good at dealing a complexed tree-construction, end-up being laggy and difficult to operate. Based on this, when you make models in SketchUp, I will recommend to unite materials if you can do, and separate them if you have a possibility to separate them in Twinmotion.
After importing, let’s operate viewport and move in front of the object. If you choose “Twinmotion” in the first navigation window, you can operate as shown in below. (There is other ways to operate, for example using arrow keys, but at first you’d better to know these four way!)
- Dolly(moving)・・・middle drag
- Orbit(moving around selecting object)・・・Shift + middle drag
- Pan(moving sight from fixed position)・・・right drag
- Focus(matching screen to selecting object)・・・Select object and shortcut “F”
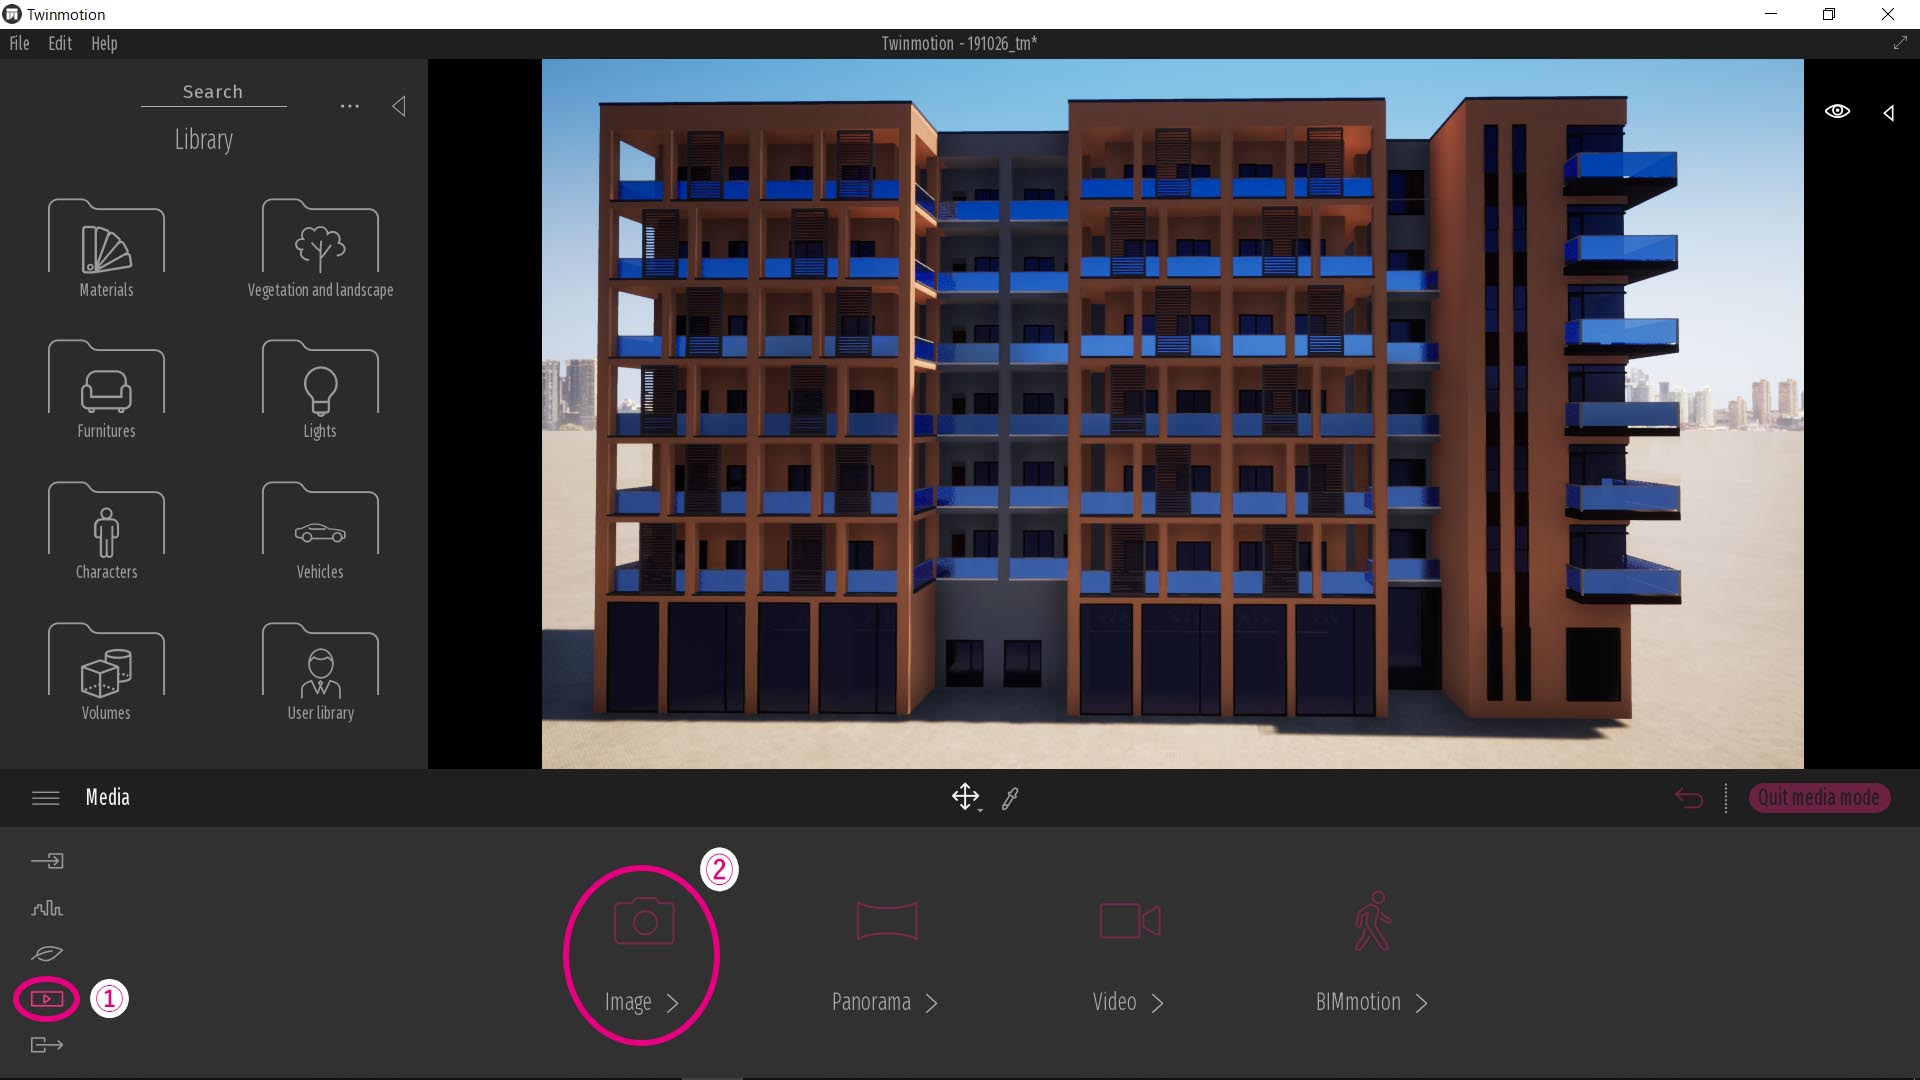
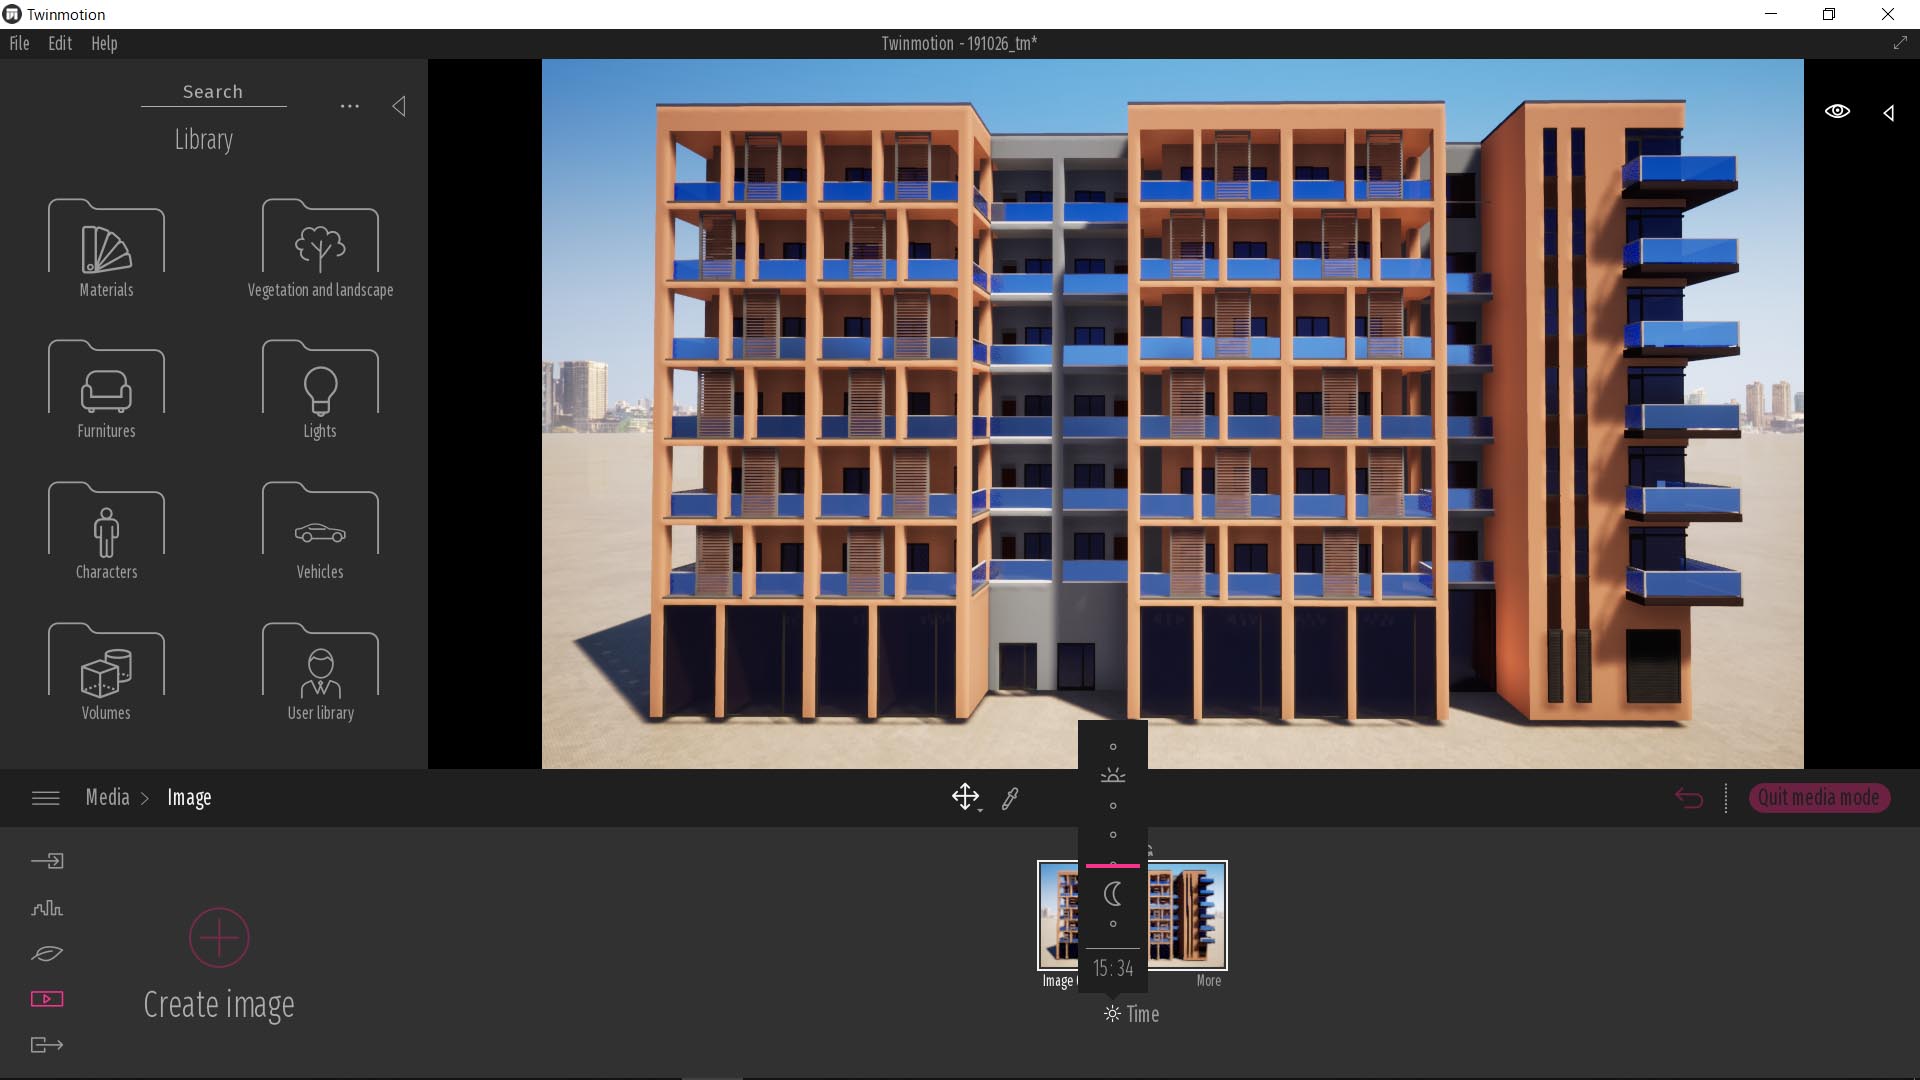
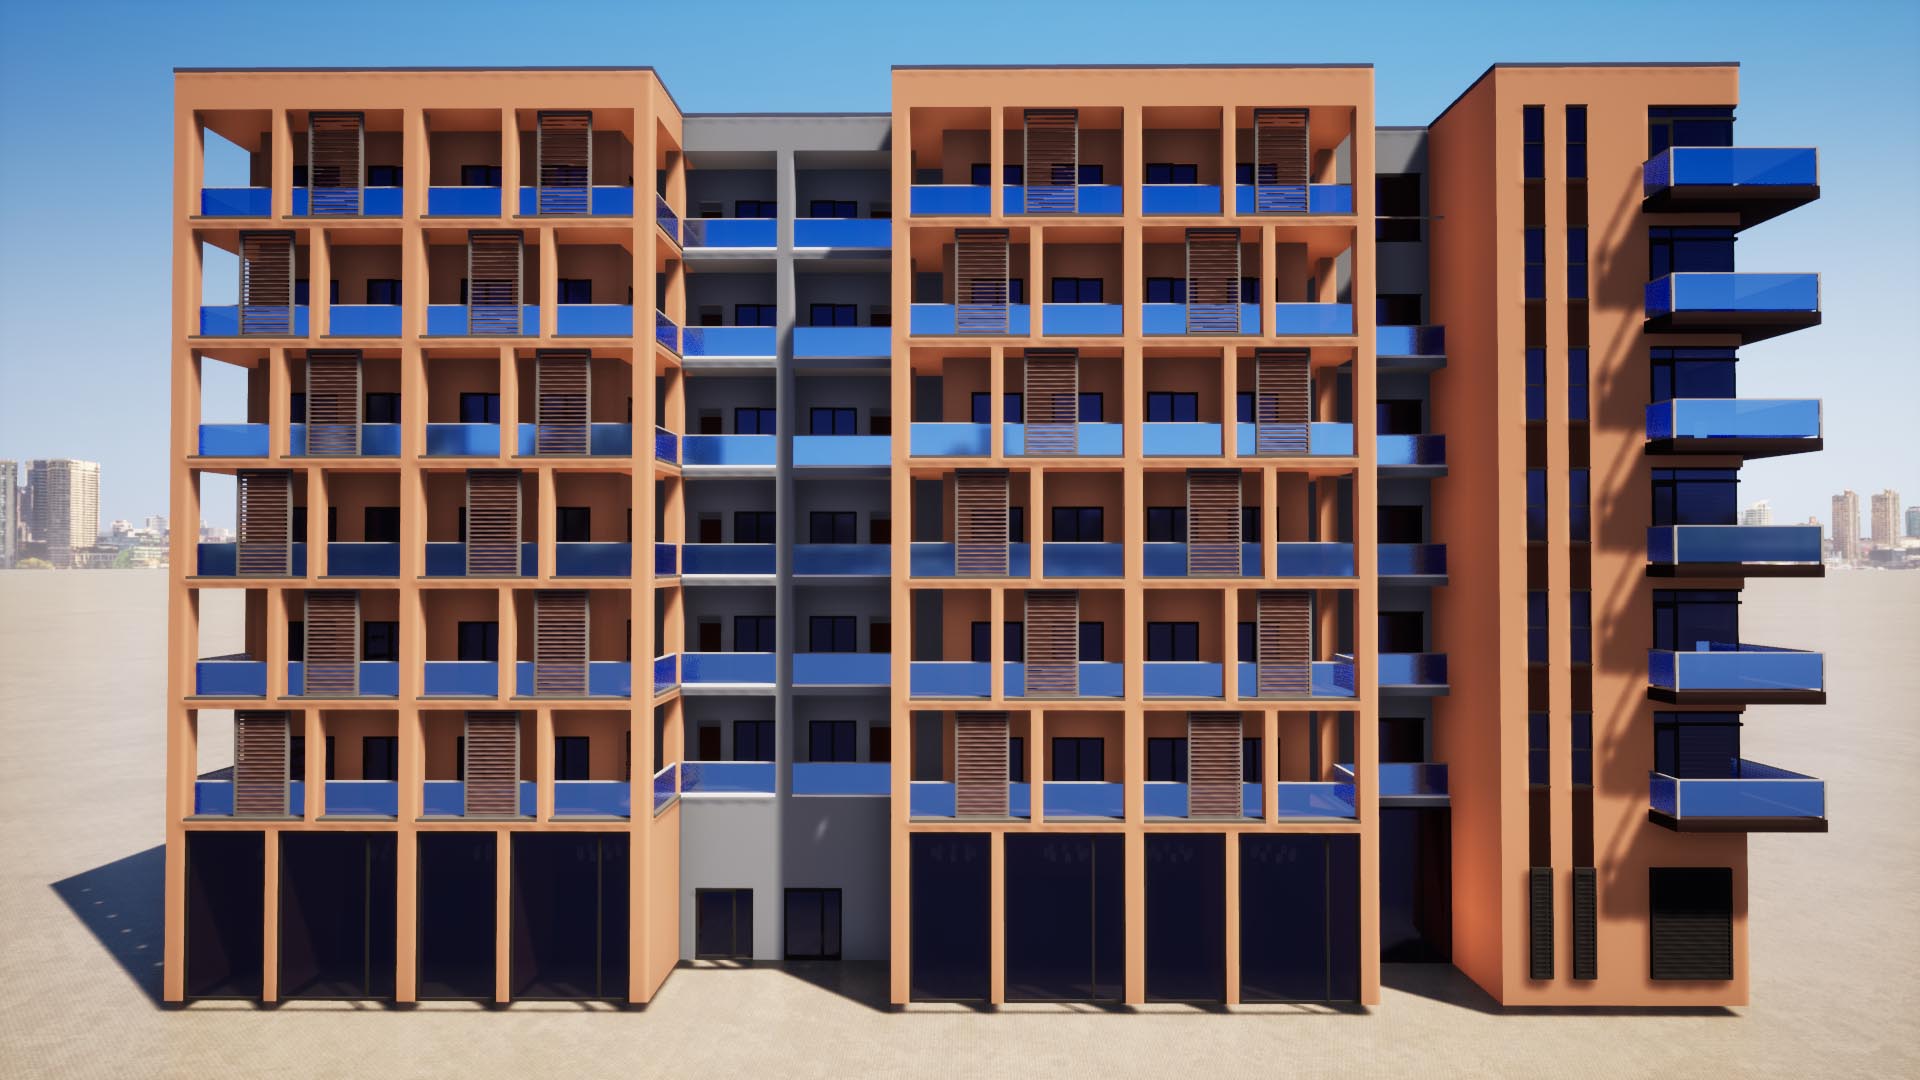
I could move in front of the object. Next, let’s export an image file. Please select Media > Image > Create Image from the left-bottom, you can make temporary image data. If you want to change the view angle, you can operate view port and push the remake icon. And you can adjust sun light from “Time” icon.

I adjucted “Time”.
Exporting Images
Please select Export > Image from the left-bottom, and check the image name which you made. When you push “Start export” button, rendering will be finished only a few seconds, and you can get .png image file! It is one of the advantages of Twinmotion, due to using real-time engine. You probably take more and more times for rendering using Podium plug-in, V-Ray, or other softwares.
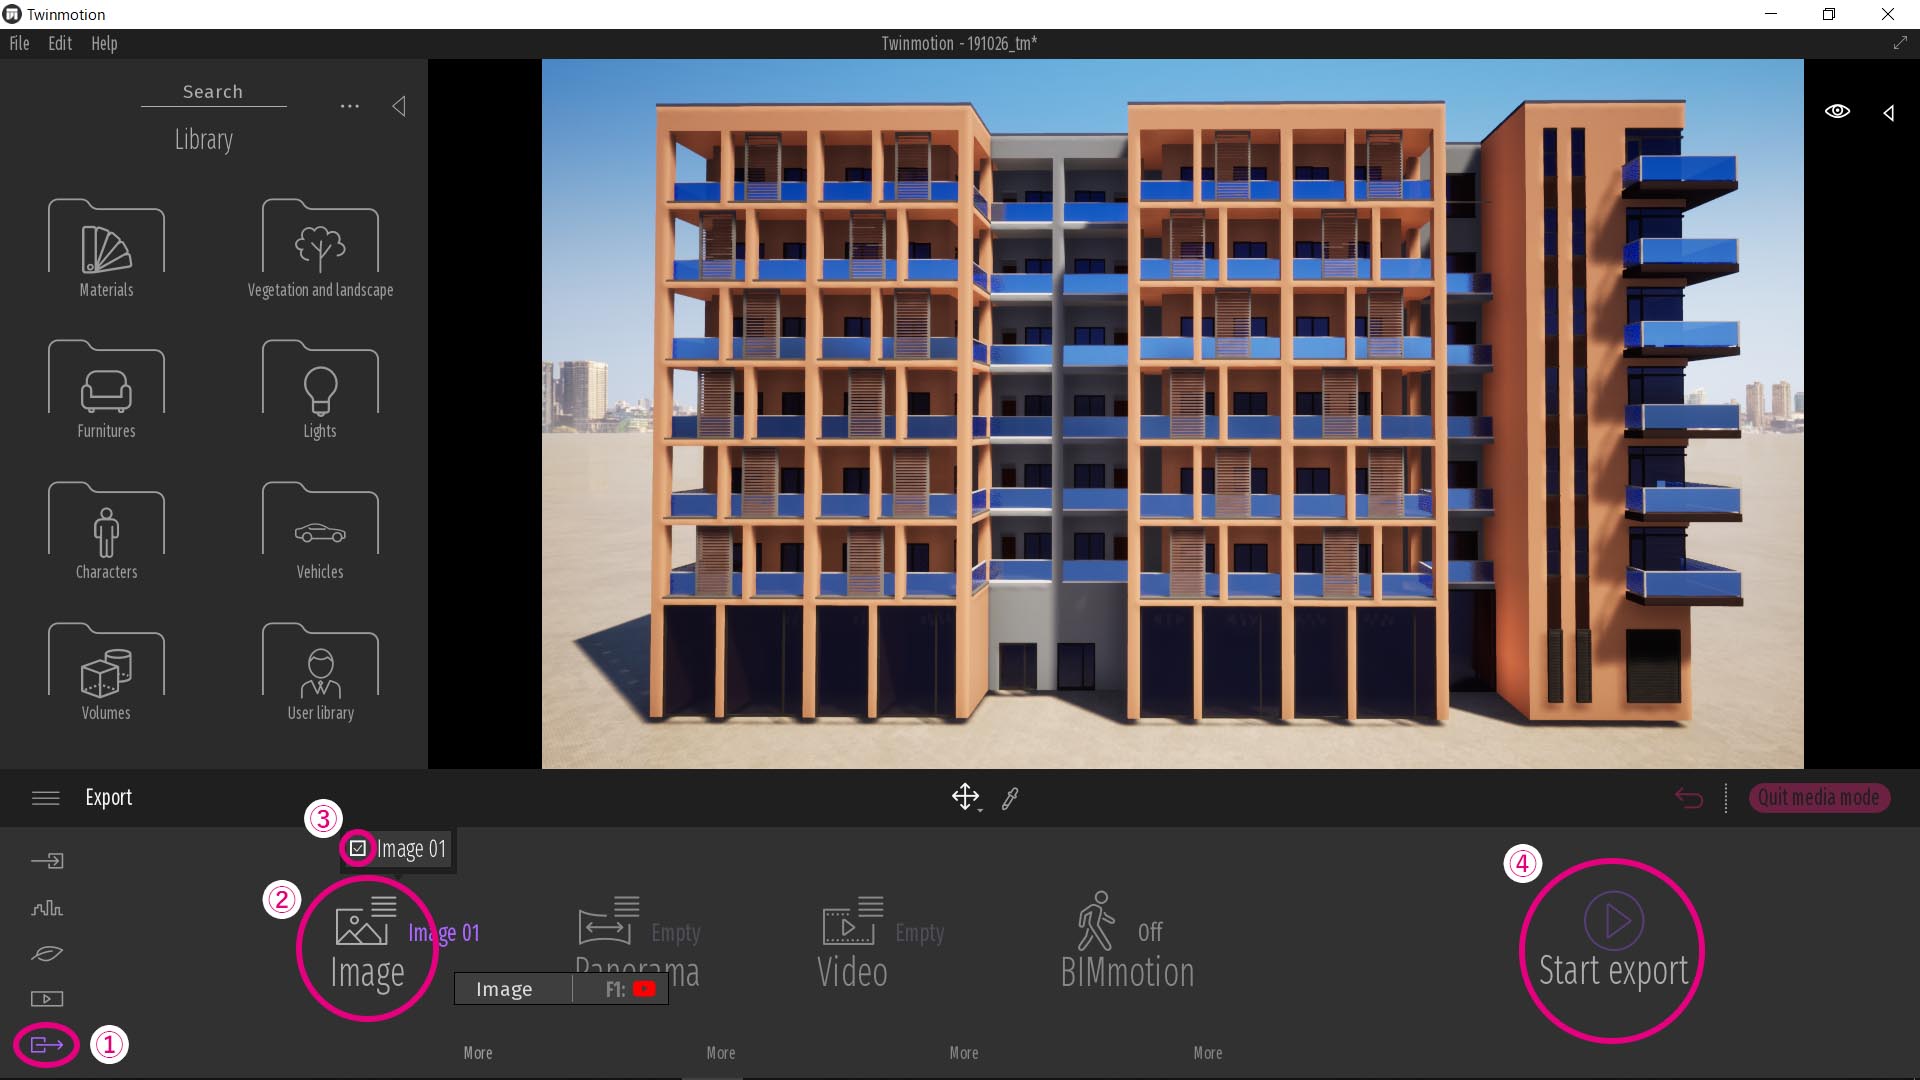
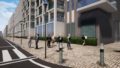
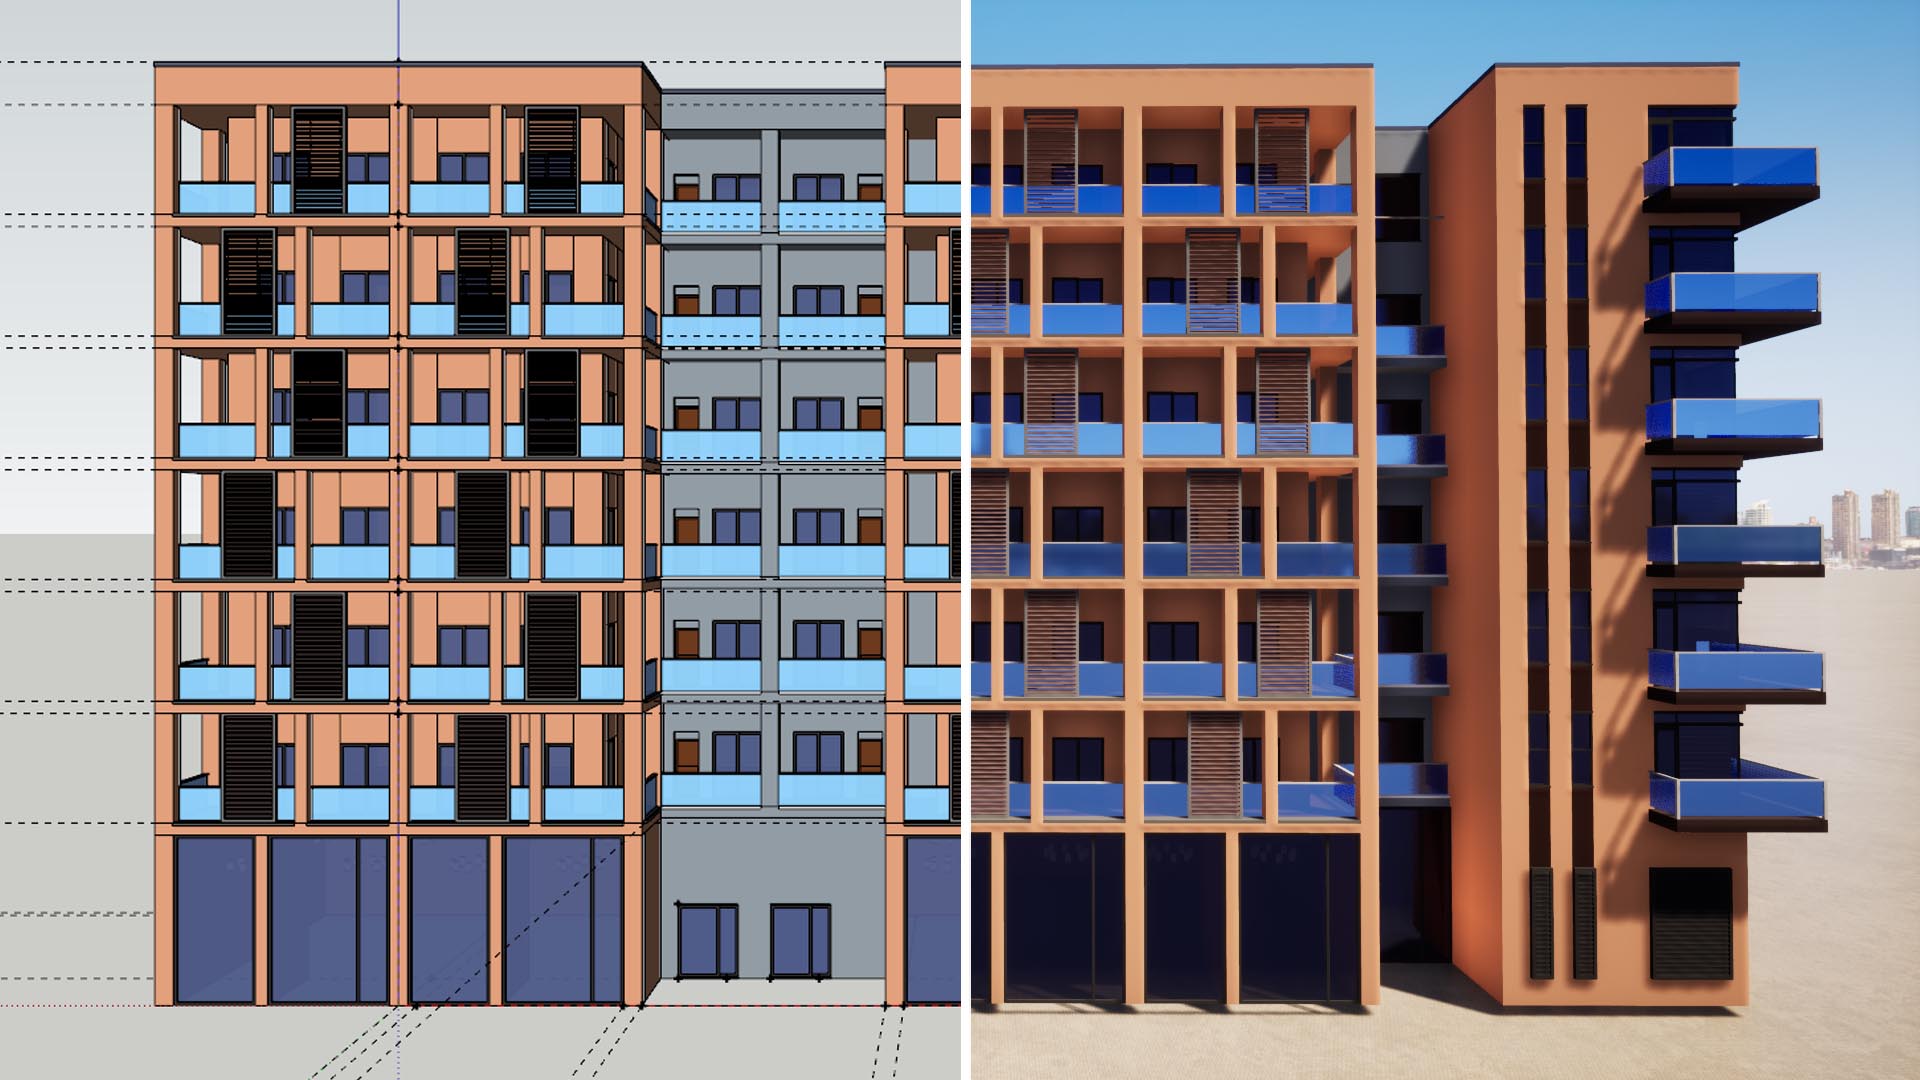
I only used default setting, but could make the image more realistic from original SketchUp image!
That was basic workflow to export images.
There are many potentials in Twinmotion. In future, I want show you some tips for upgrading quality of your design.
That’s all. Thank you!