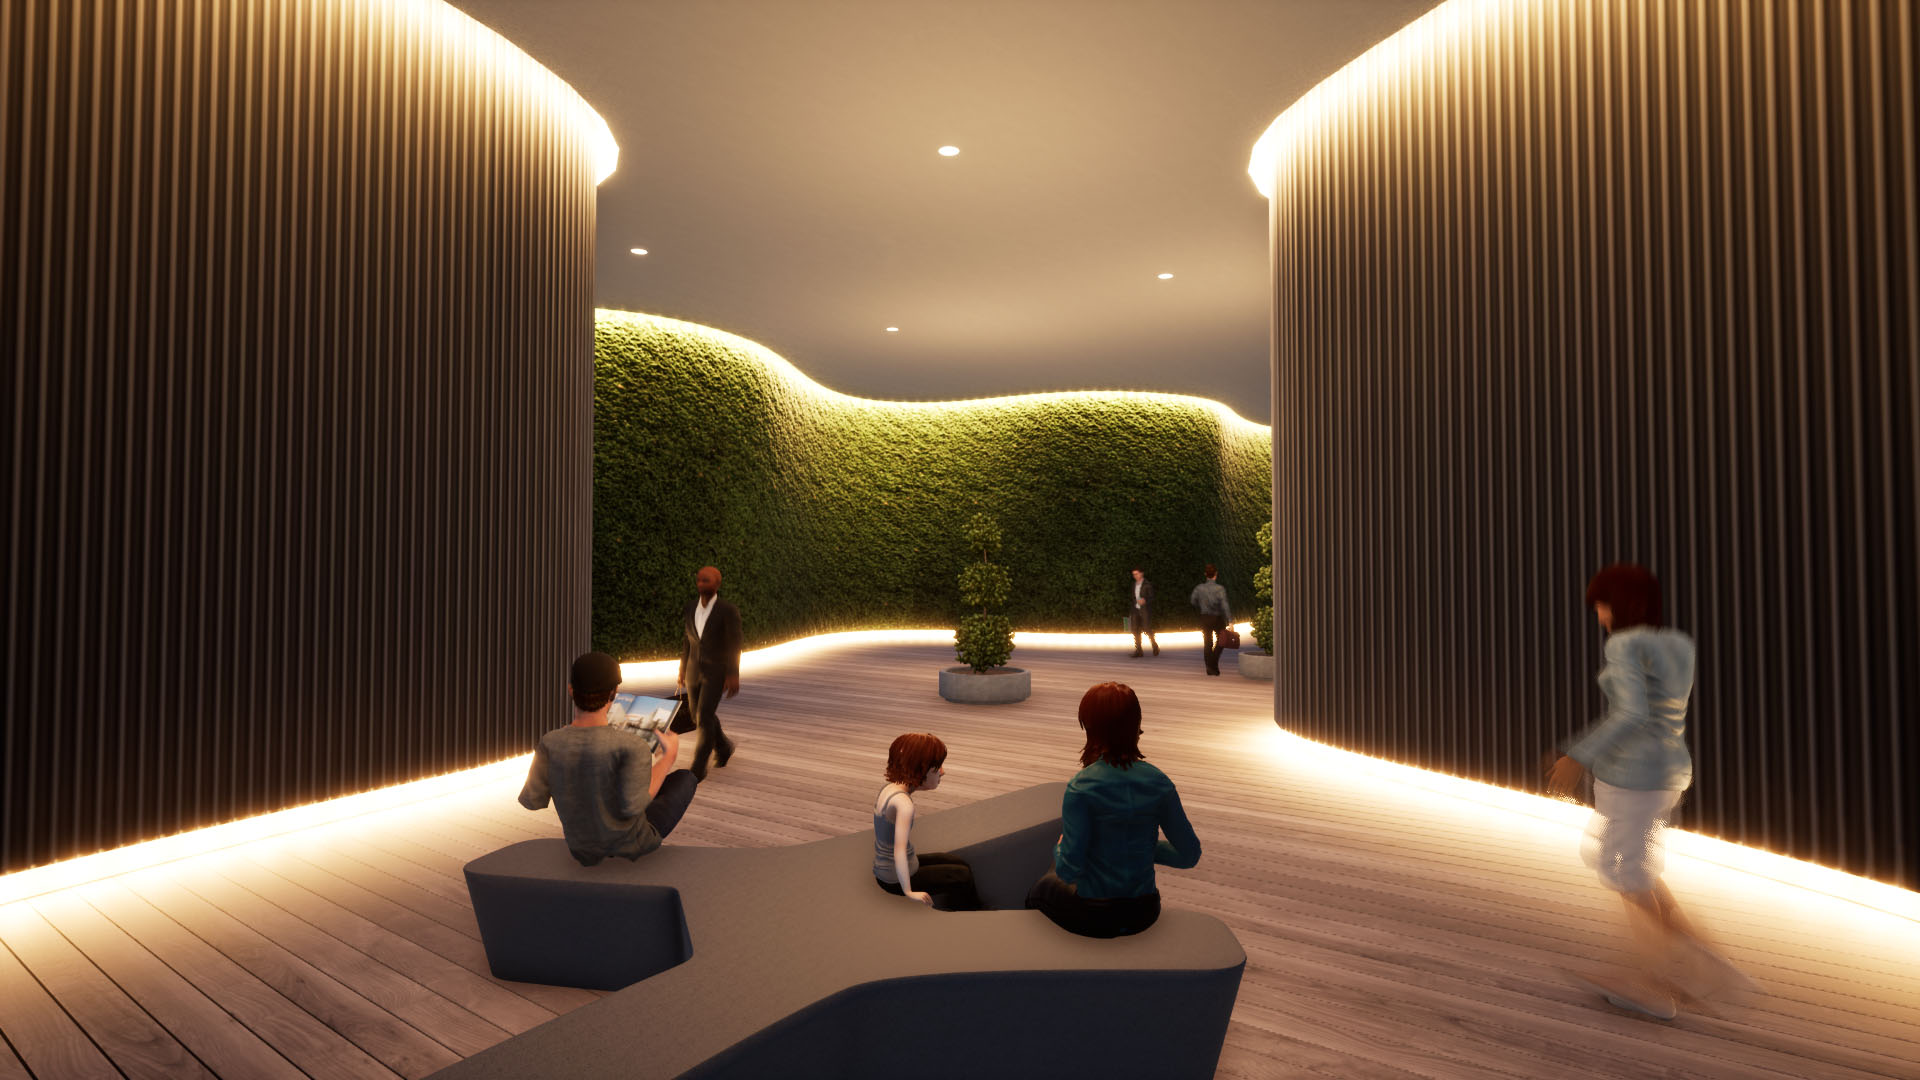
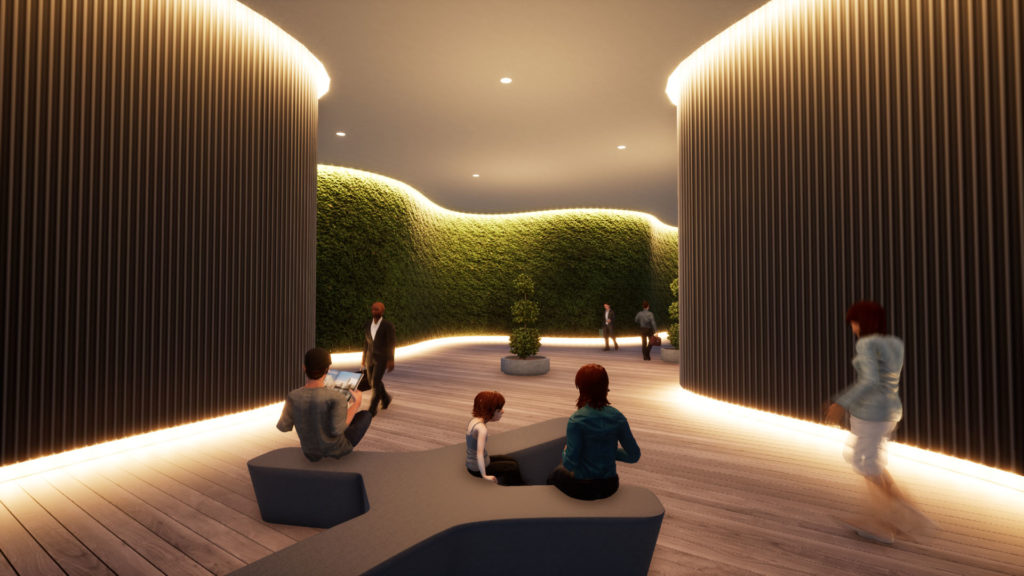
Twinmotion have assets of point light and line light, but do not have curved line light. You may copy and array point lights but it is very tough. Here I will show you an example to make curved indirect light using a function “Replace object”.
Overview
In short, curved line light will be consisted of a series of point lights. I will set position of dummy objects in SketchUp (or another modeling software), and then replace them at once to point lights in Twinmotion.
Required SketchUp plugin
In this method, a function that can array objects along curve is required. I recommend a plugin “CopyAlongCurve” (made by Anton_S), that you can register and download from SketchUcation.
Making path along position of light source
At first, I will make a path as a shape of the curved light in SketchUp. It does not matter which you choose the way using line tool in SketchUp or importing .dwg path. If you want to know the way to import Illustrator paths to SketchUp, please see the first half of article below.
【SketchUp】Making Channel Letter Sign from Logo Data of Illustrator
In this example, I will set indirect light at the bottom of a curved wall.

It is better to place the path away from wall and floor about 150mm. I will show you the reason later.

Arrange dummy cubes
Next, please create a 100mm cube and make group, then move it to a position that the path penetrates almost the center of the cube.
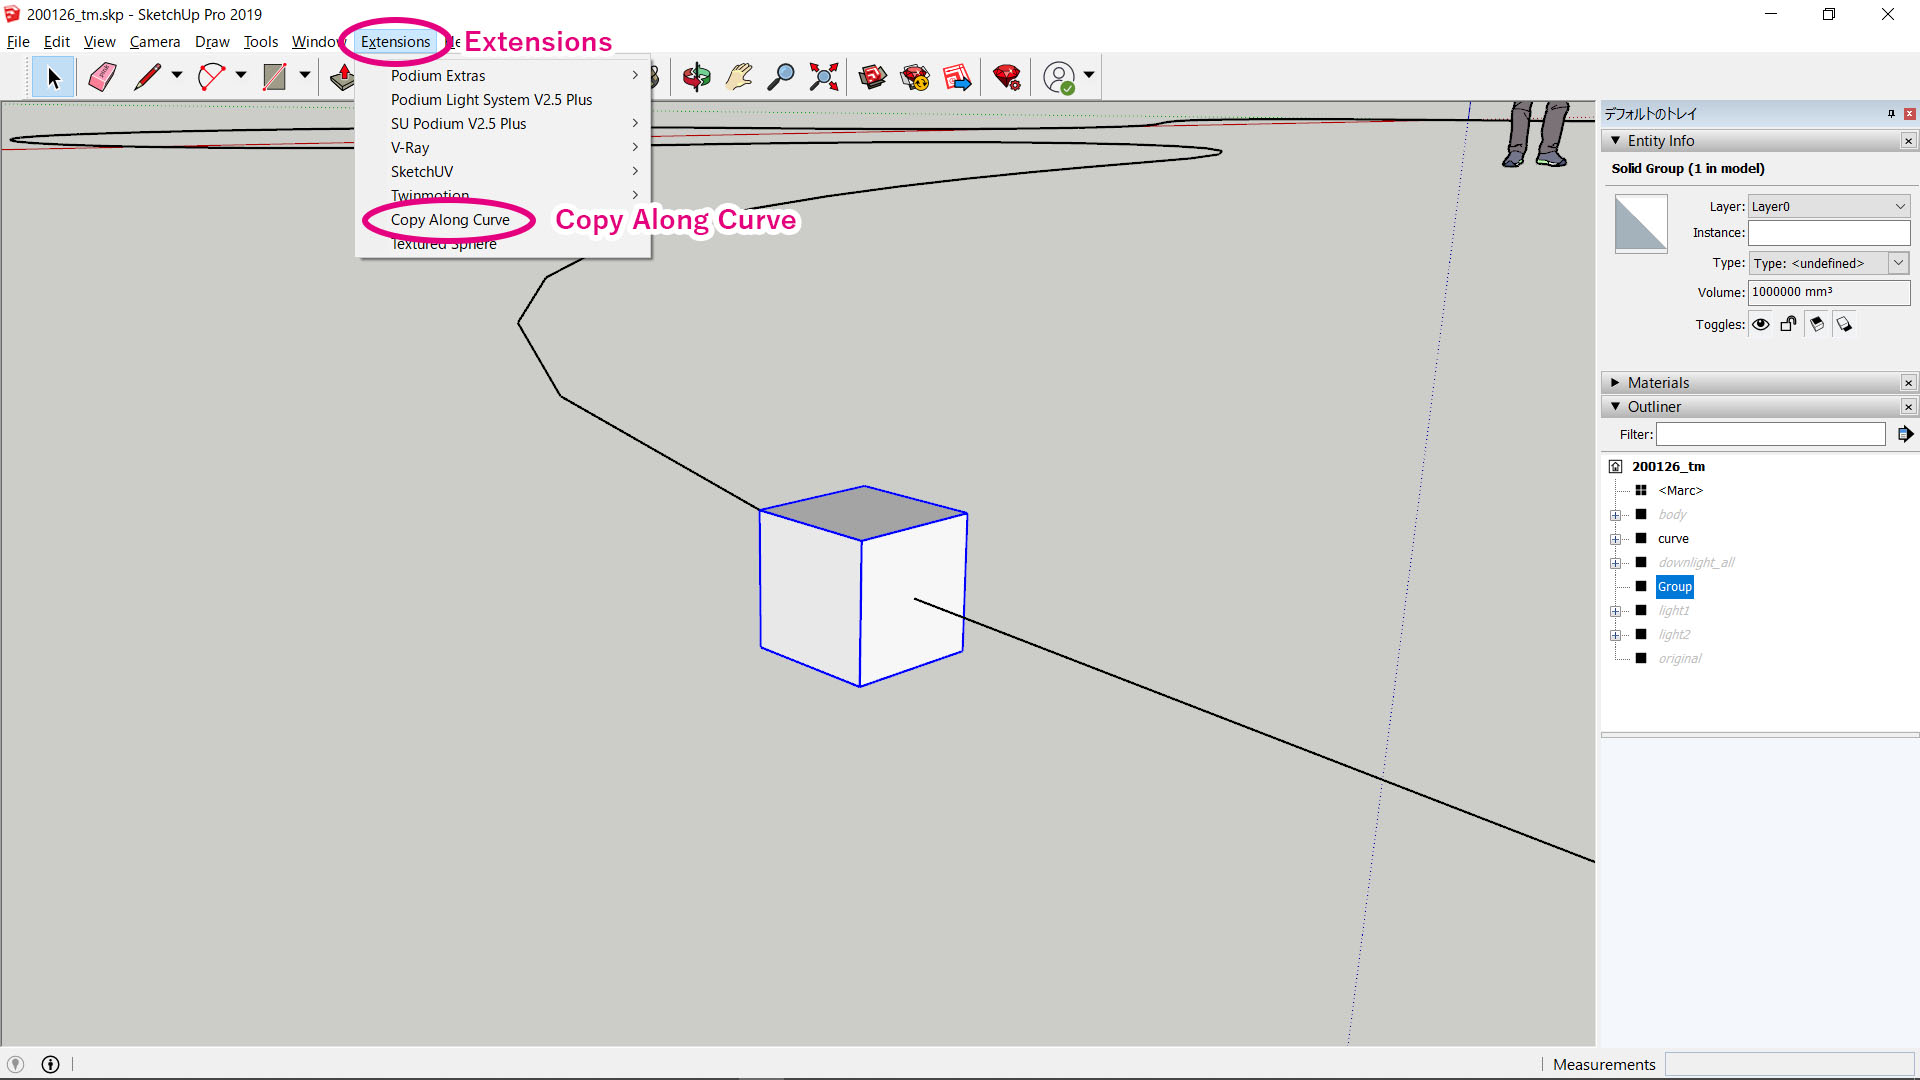
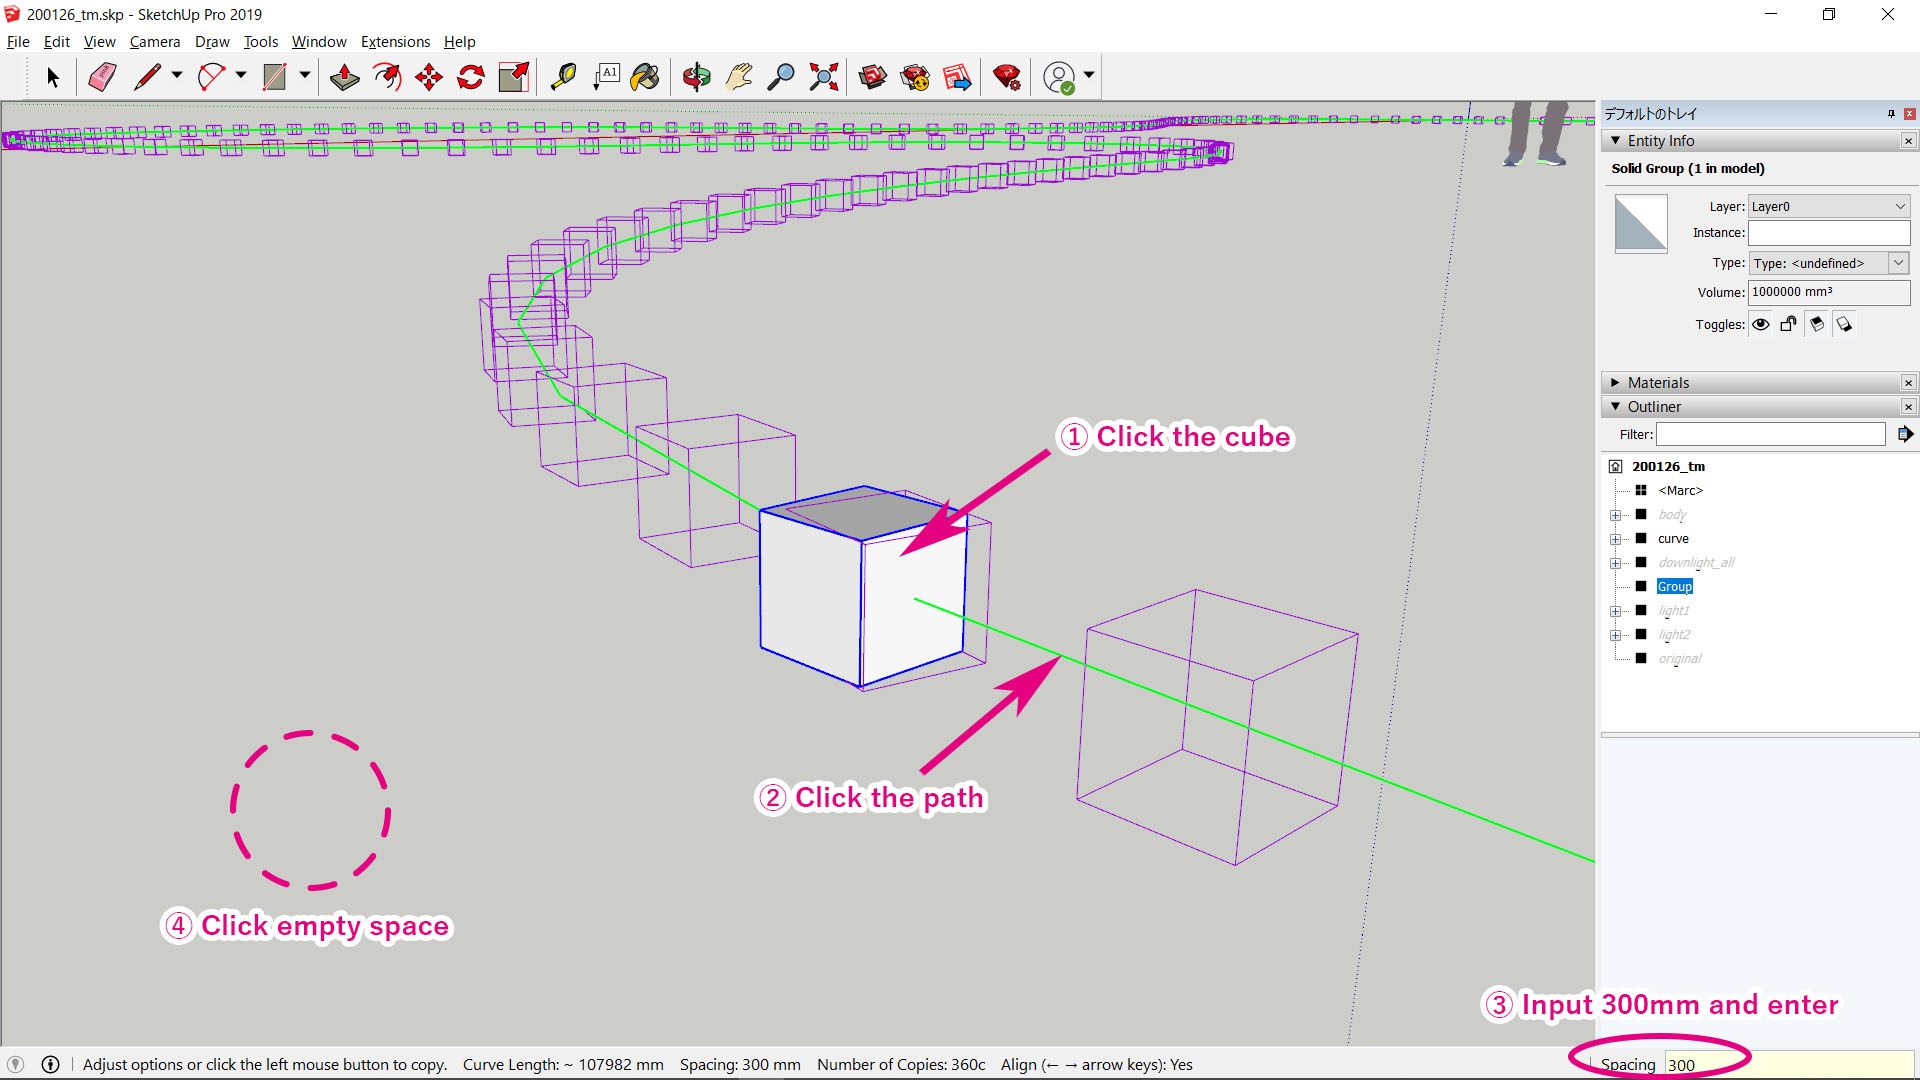
It is the plugin’s turn! Please select Extensions > Copy Along Curve, and click first the cube and second path, so that cubes will be copied along the curve. If you input “300mm” on a keyboard and press enter, the interval will become 300mm. Then, if you click empty space, these operation will be fixed. Here please select all the cubes and make group.
Before importing to Twinmotion, please save two skp files. ① Please make the cubes hidden and save file (A.skp). ② Display only the cubes and delete all other objects, and save file (B.skp). That’s all of the work in SketchUp!

Replace the cubes to light points
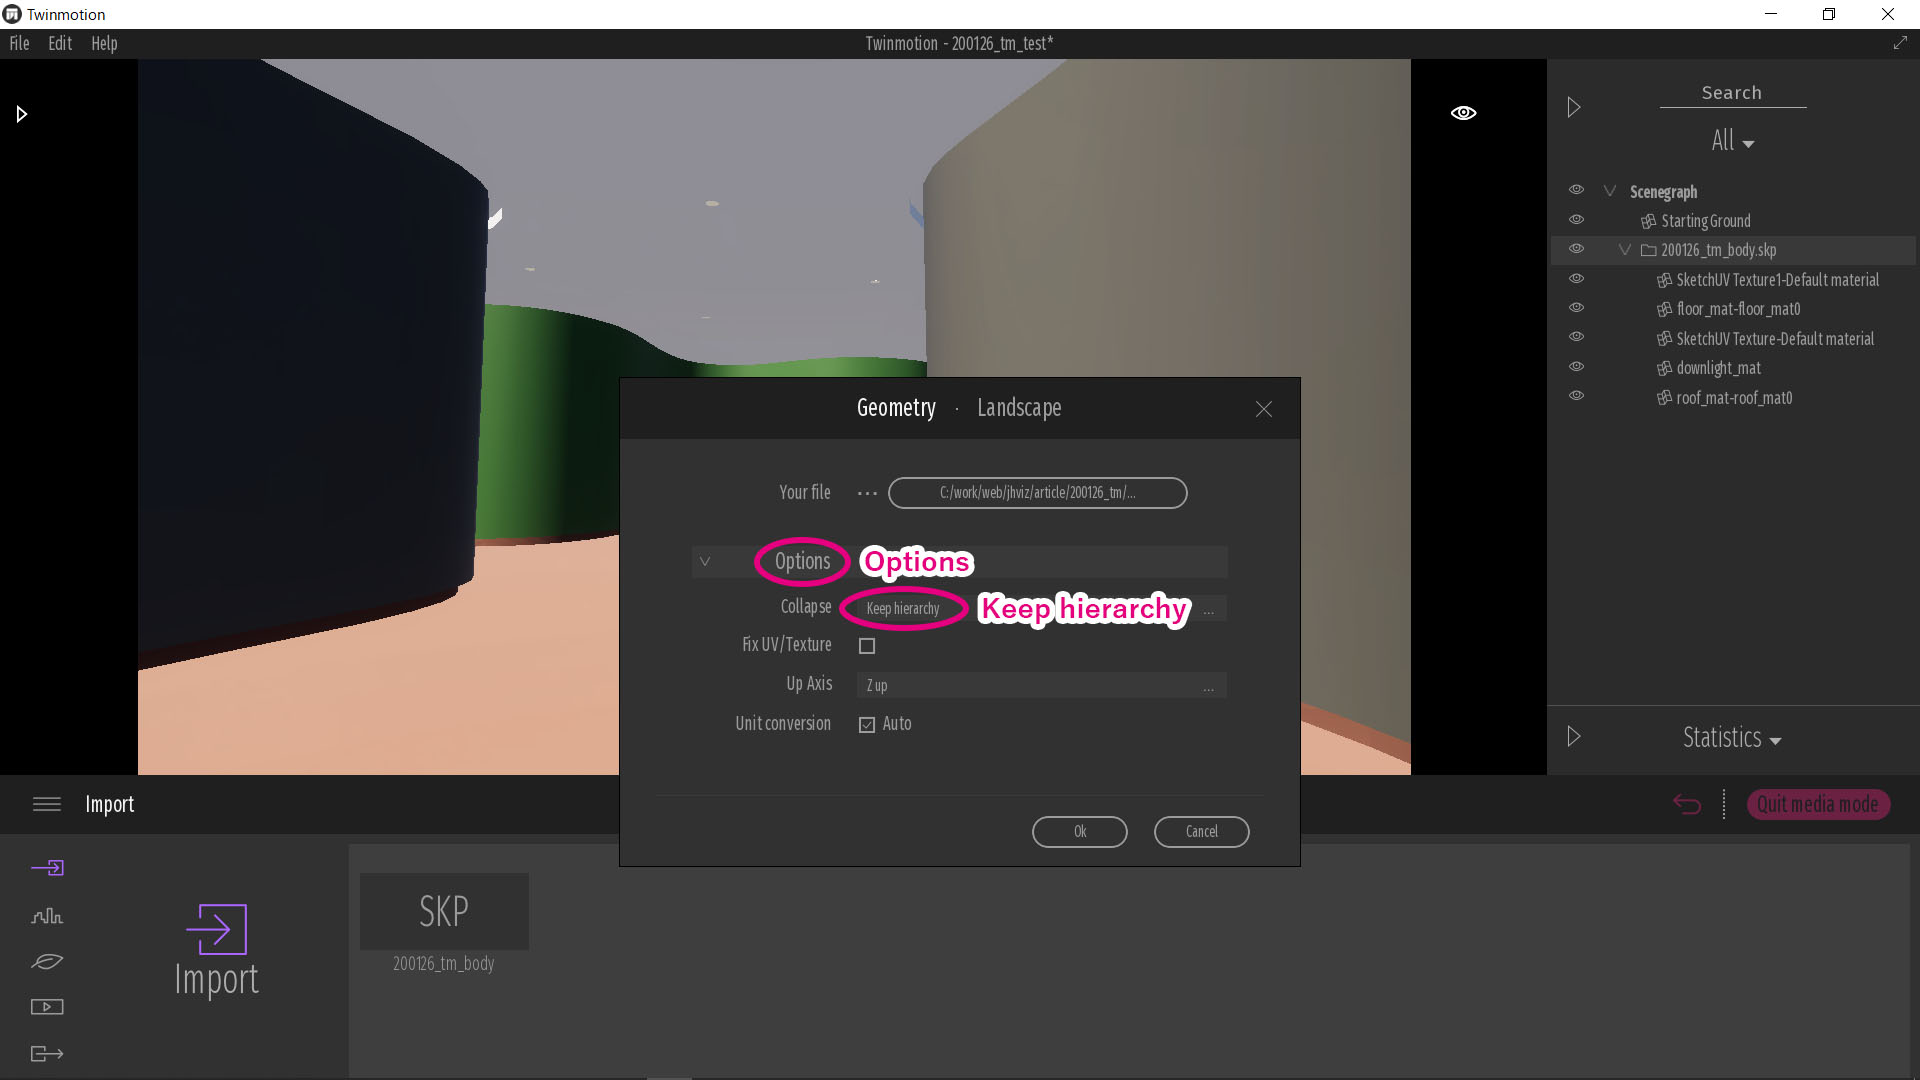
Please launch Twinmotion, and import A.skp. Next, please import B.skp selecting “keep hierarchy” from options.
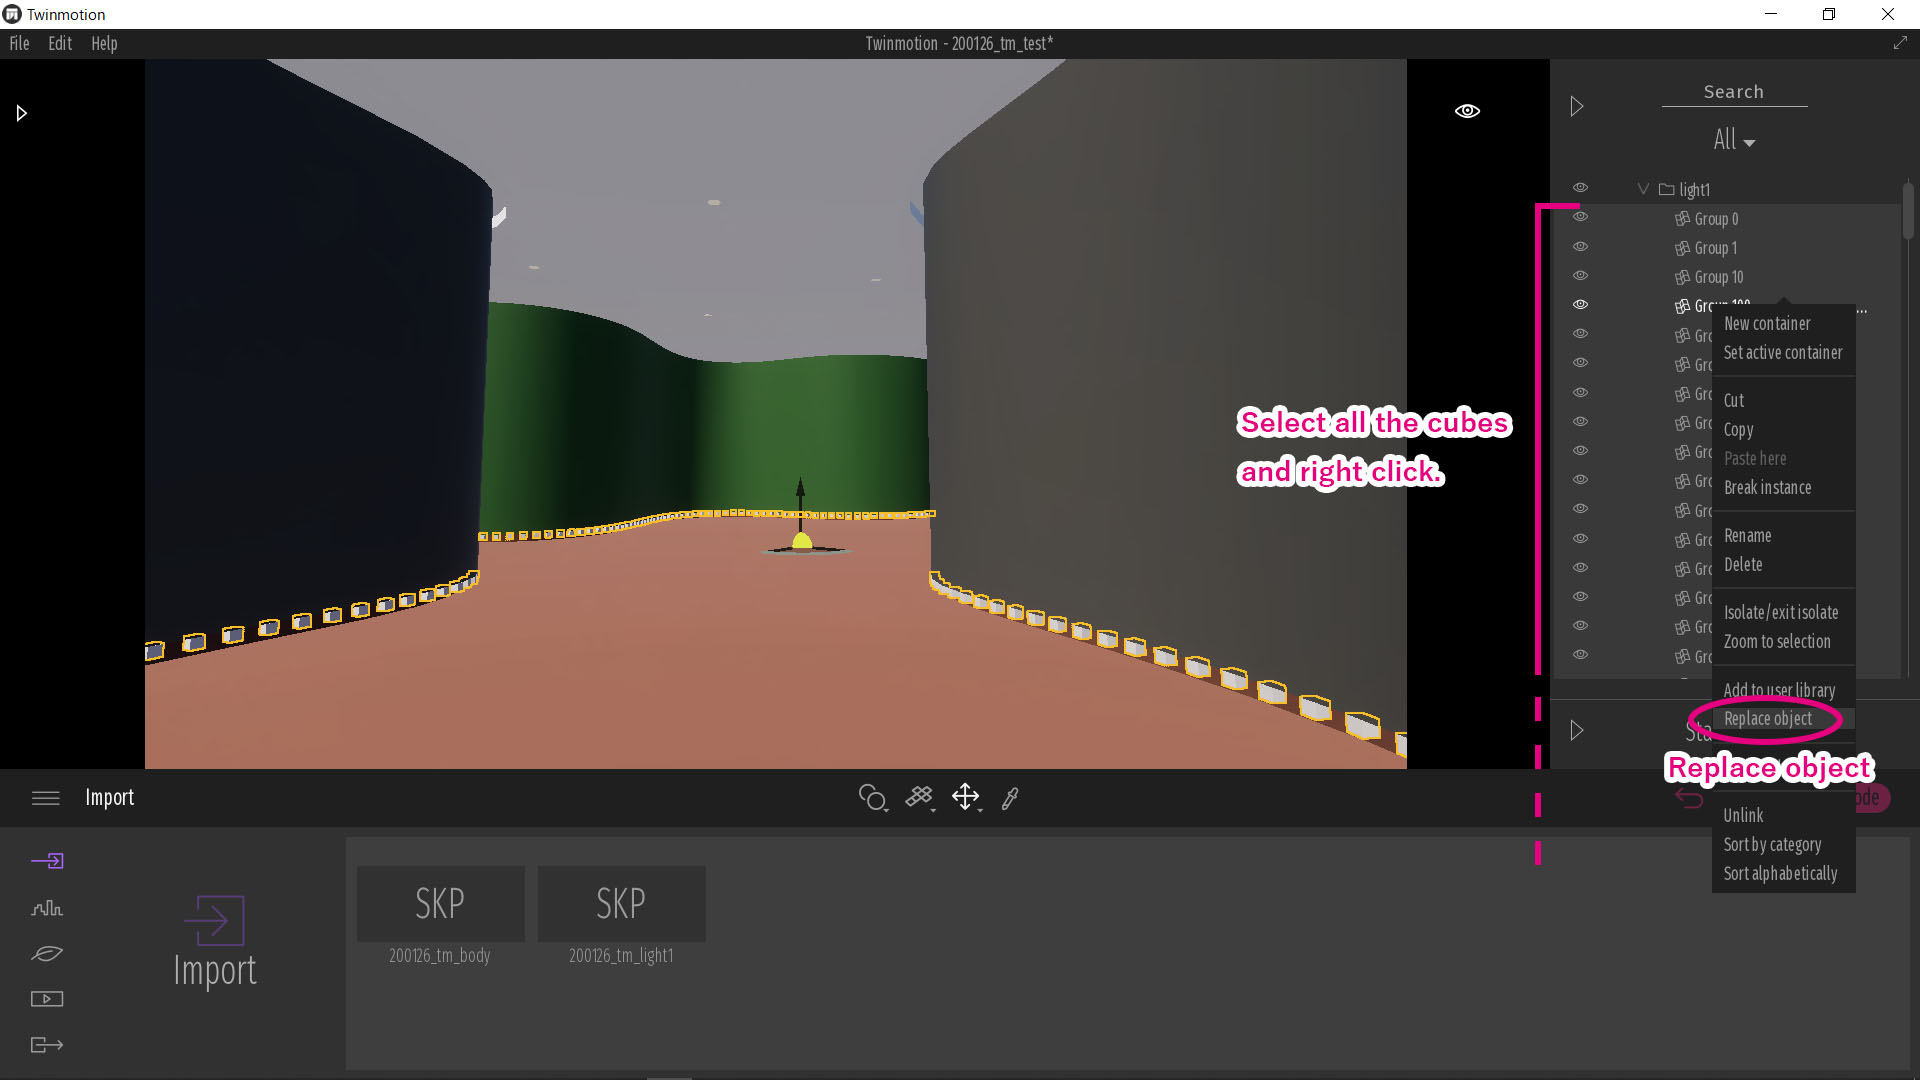
Please select all the cube objects (select top object, and then select bottom object pressing shift key) from tree view on right side. Right click, and select Replace object.
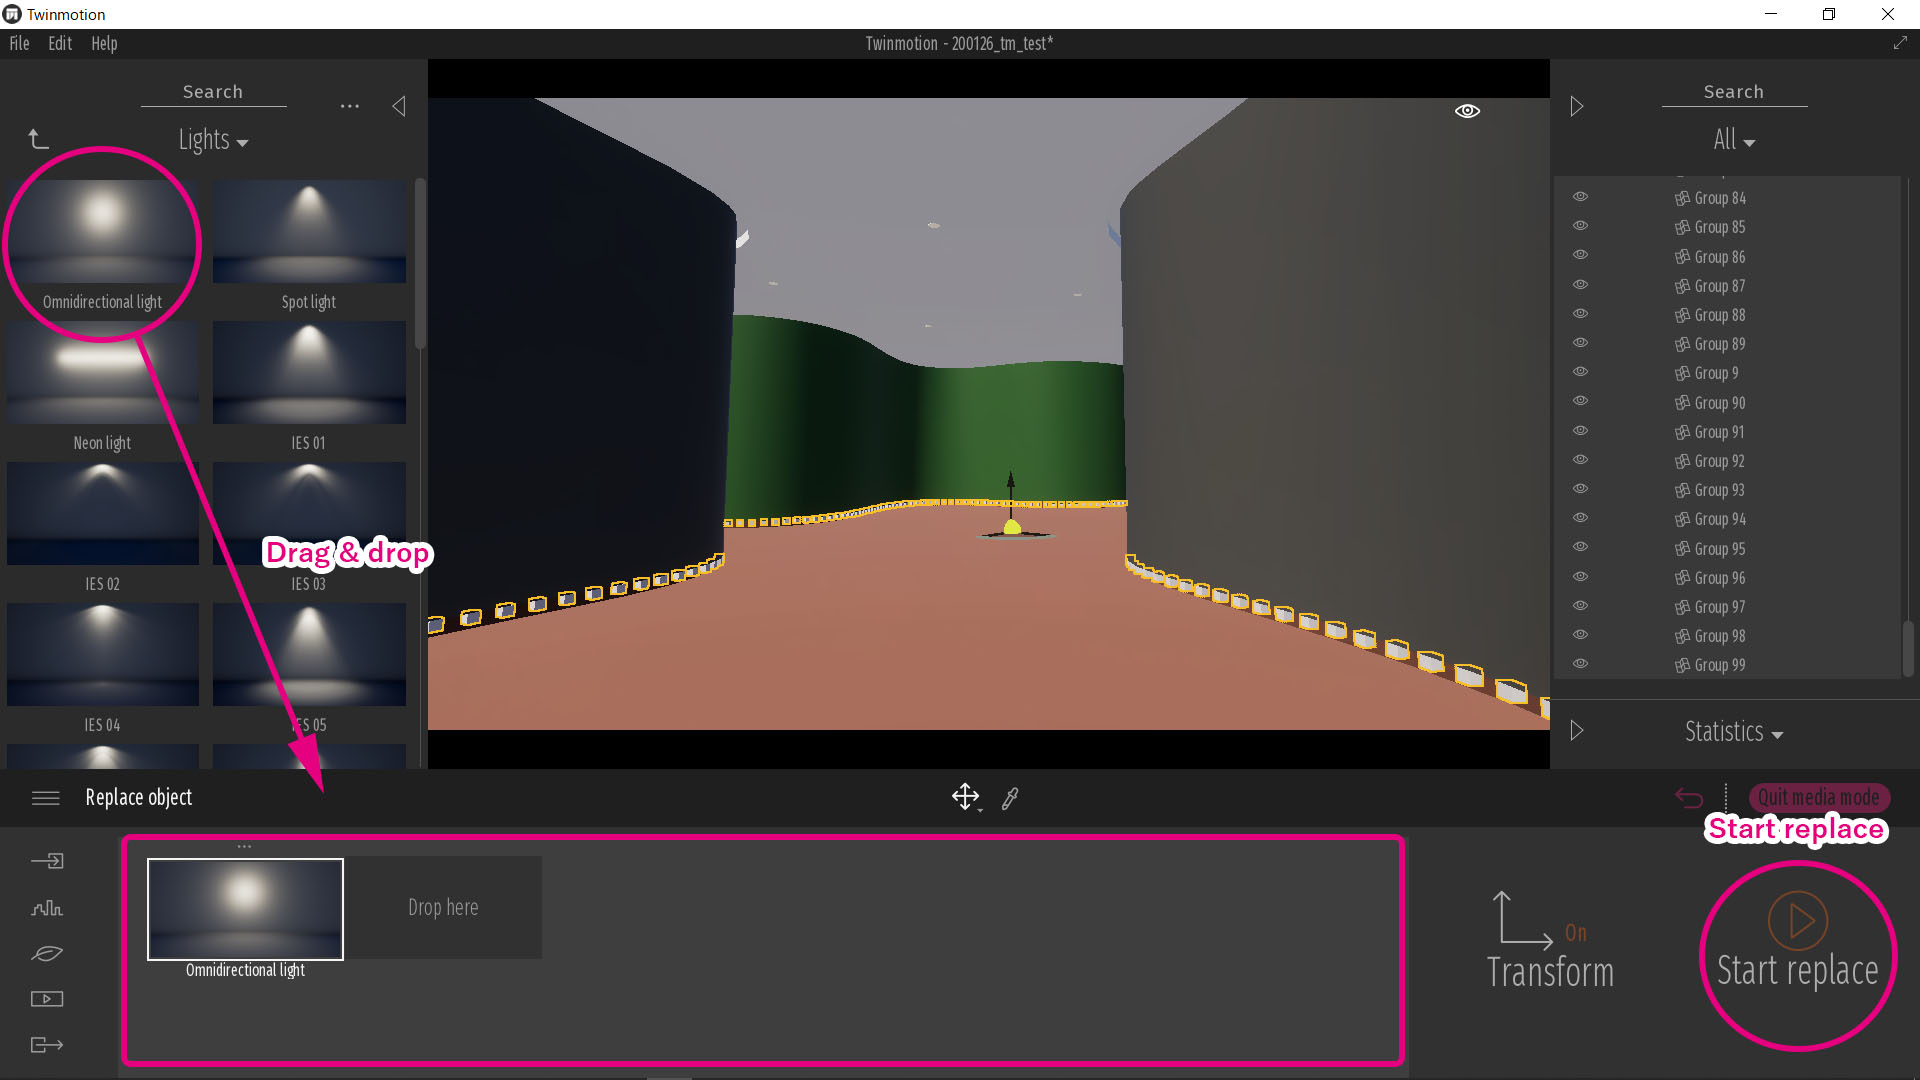
Please drag and drop “omnidirectional light” under the screen, and click “start replace”.
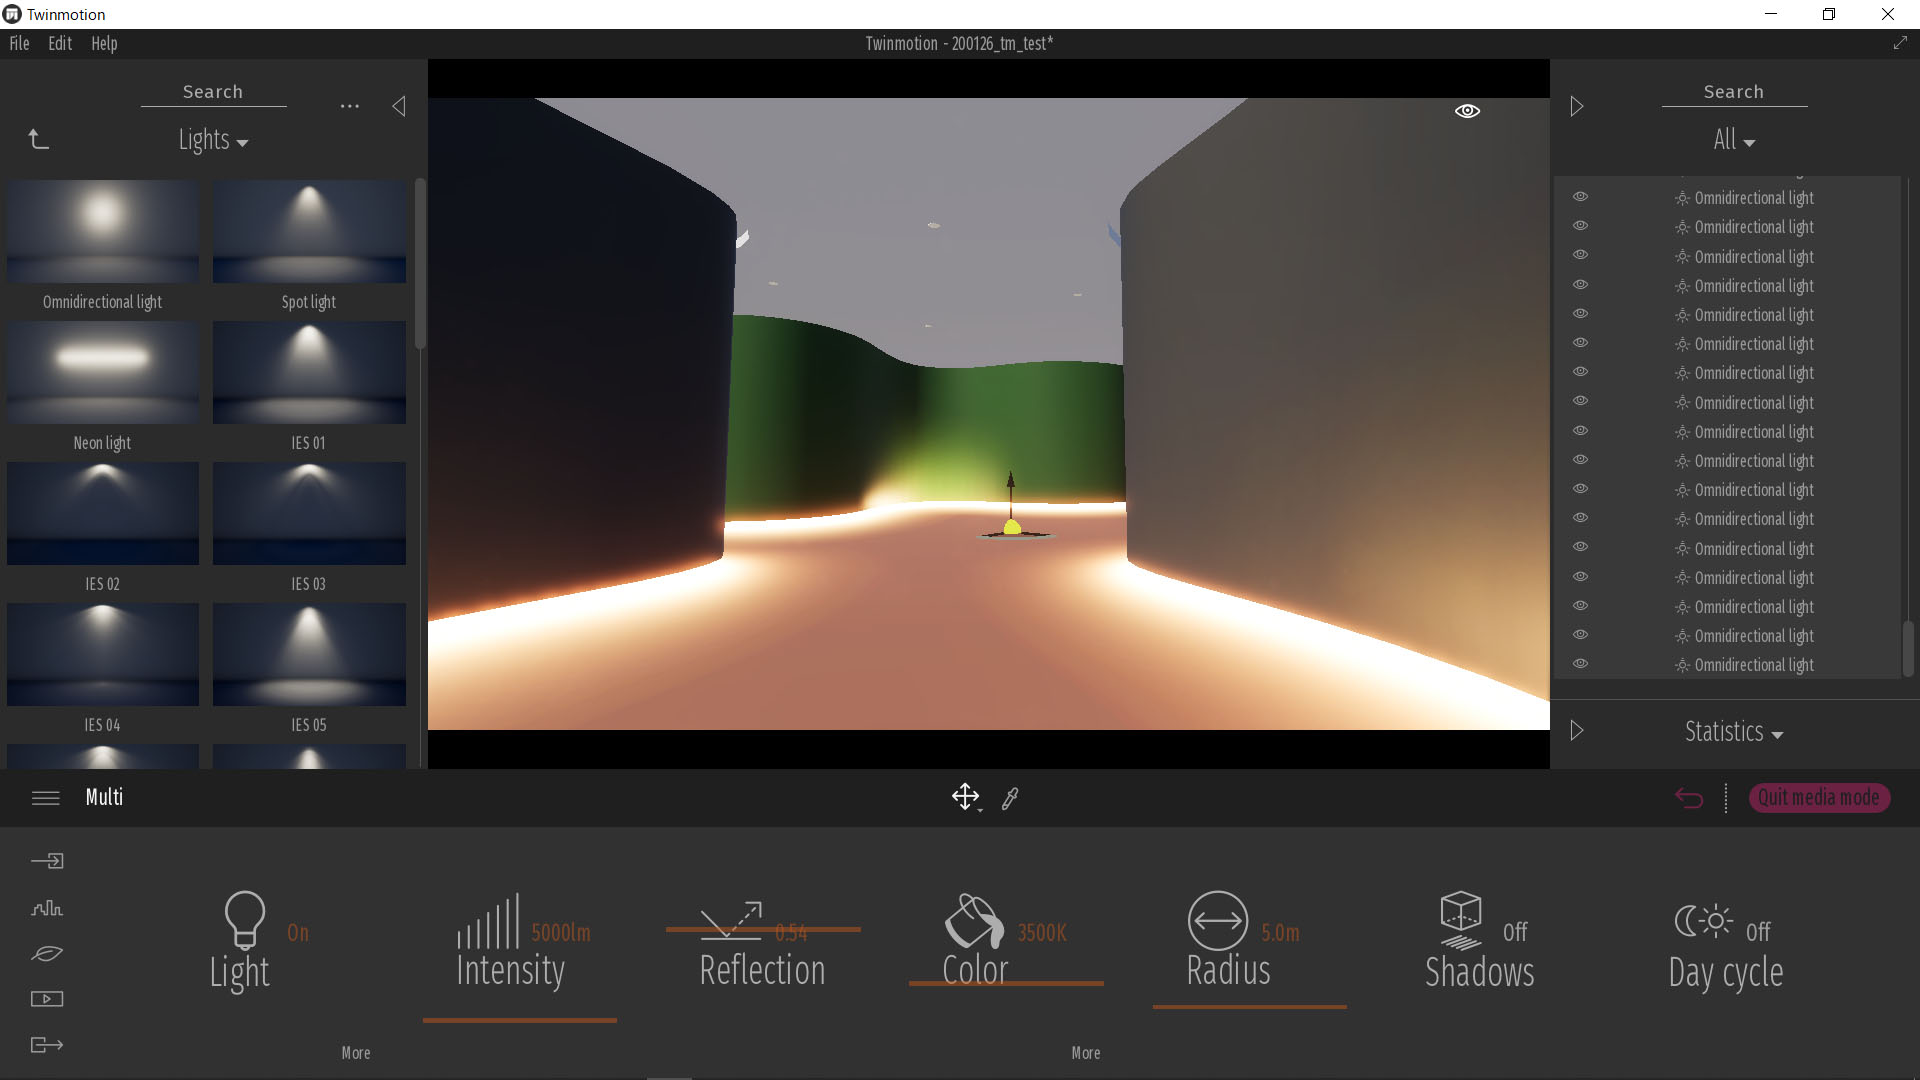
All cubes will be replaced by point lights, and now you could make curved indirect light! If you change parameters selecting all light objects, you can adjust all lights at once.
Here, if light intensity is too weak or path made by SketchUp is too close to the wall, light particles will be stand out, so please adjust not to be so. When you can not move the path away from the wall, you can set interval of the cubes less than 300mm so the lights can be seen smoother.
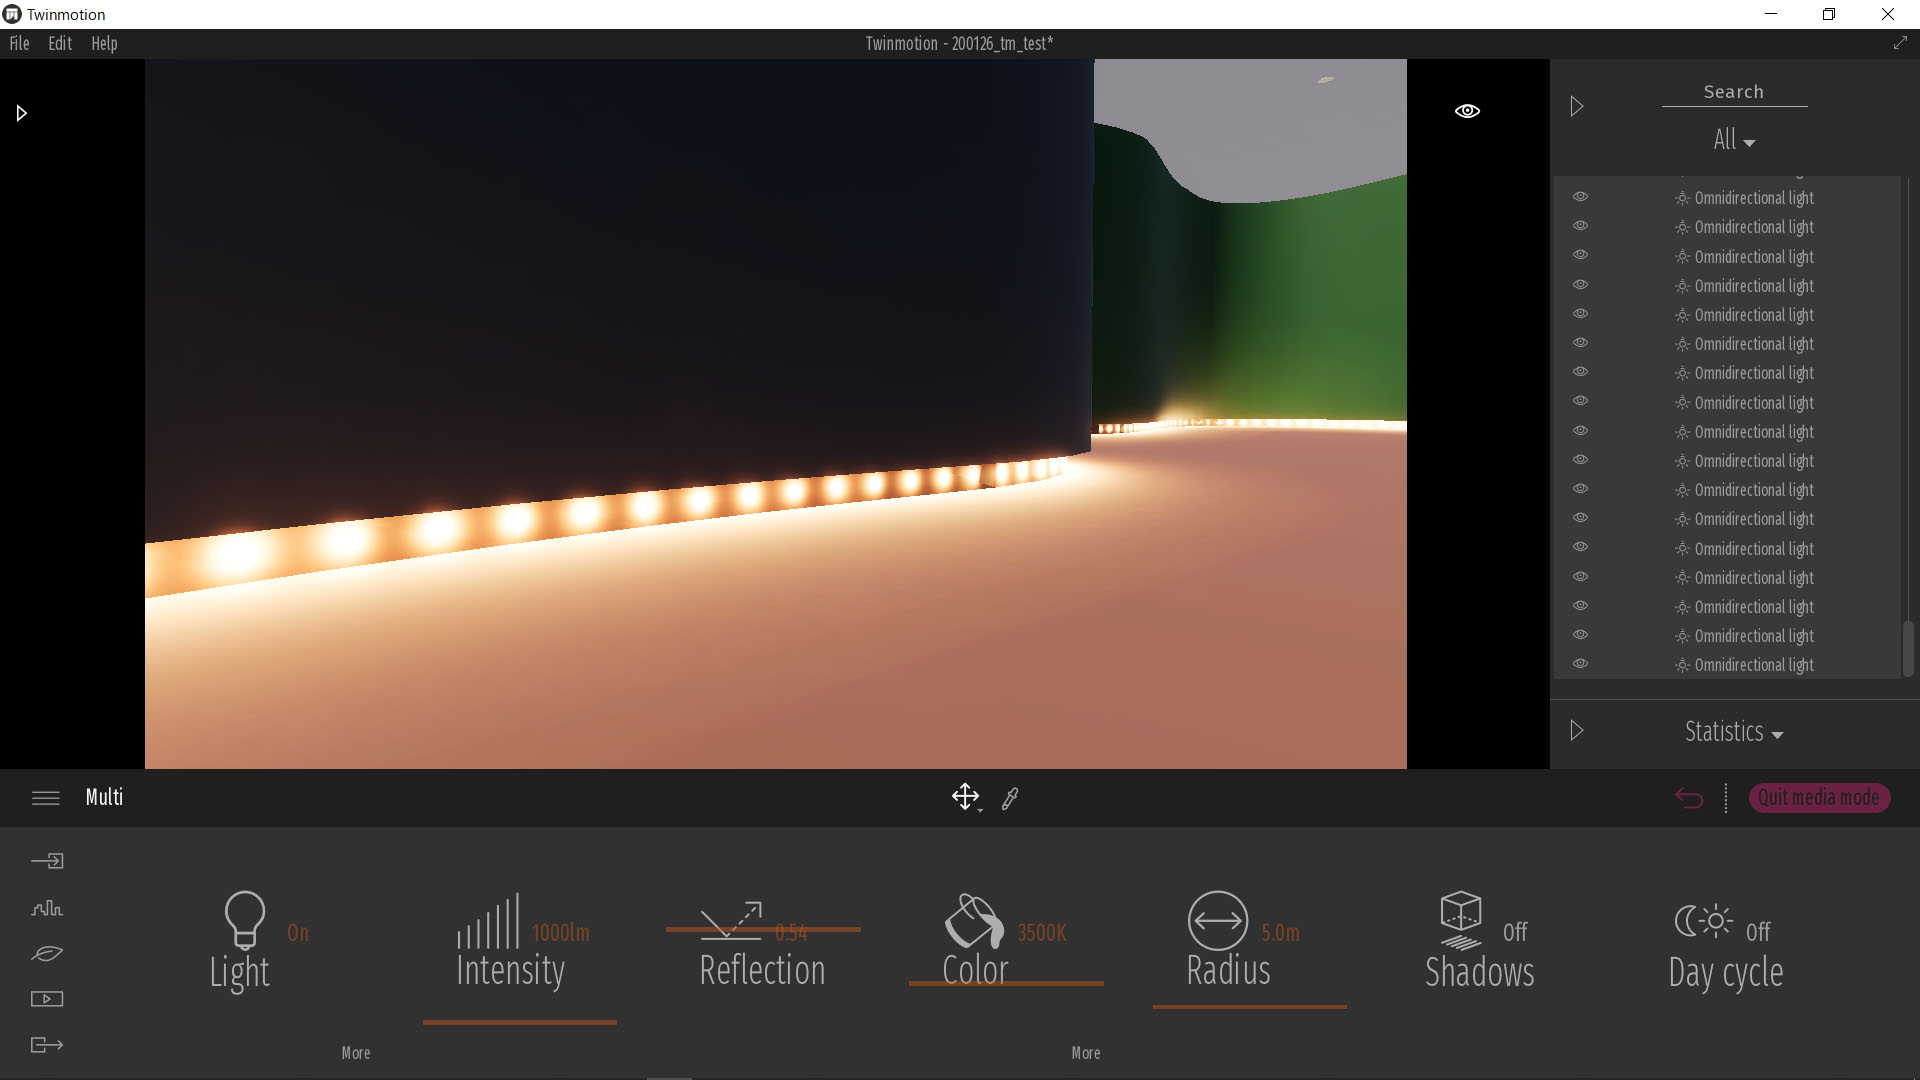
Using this way, you can visualize not only indirect light against floor but also one against curved wall!
Point to notice
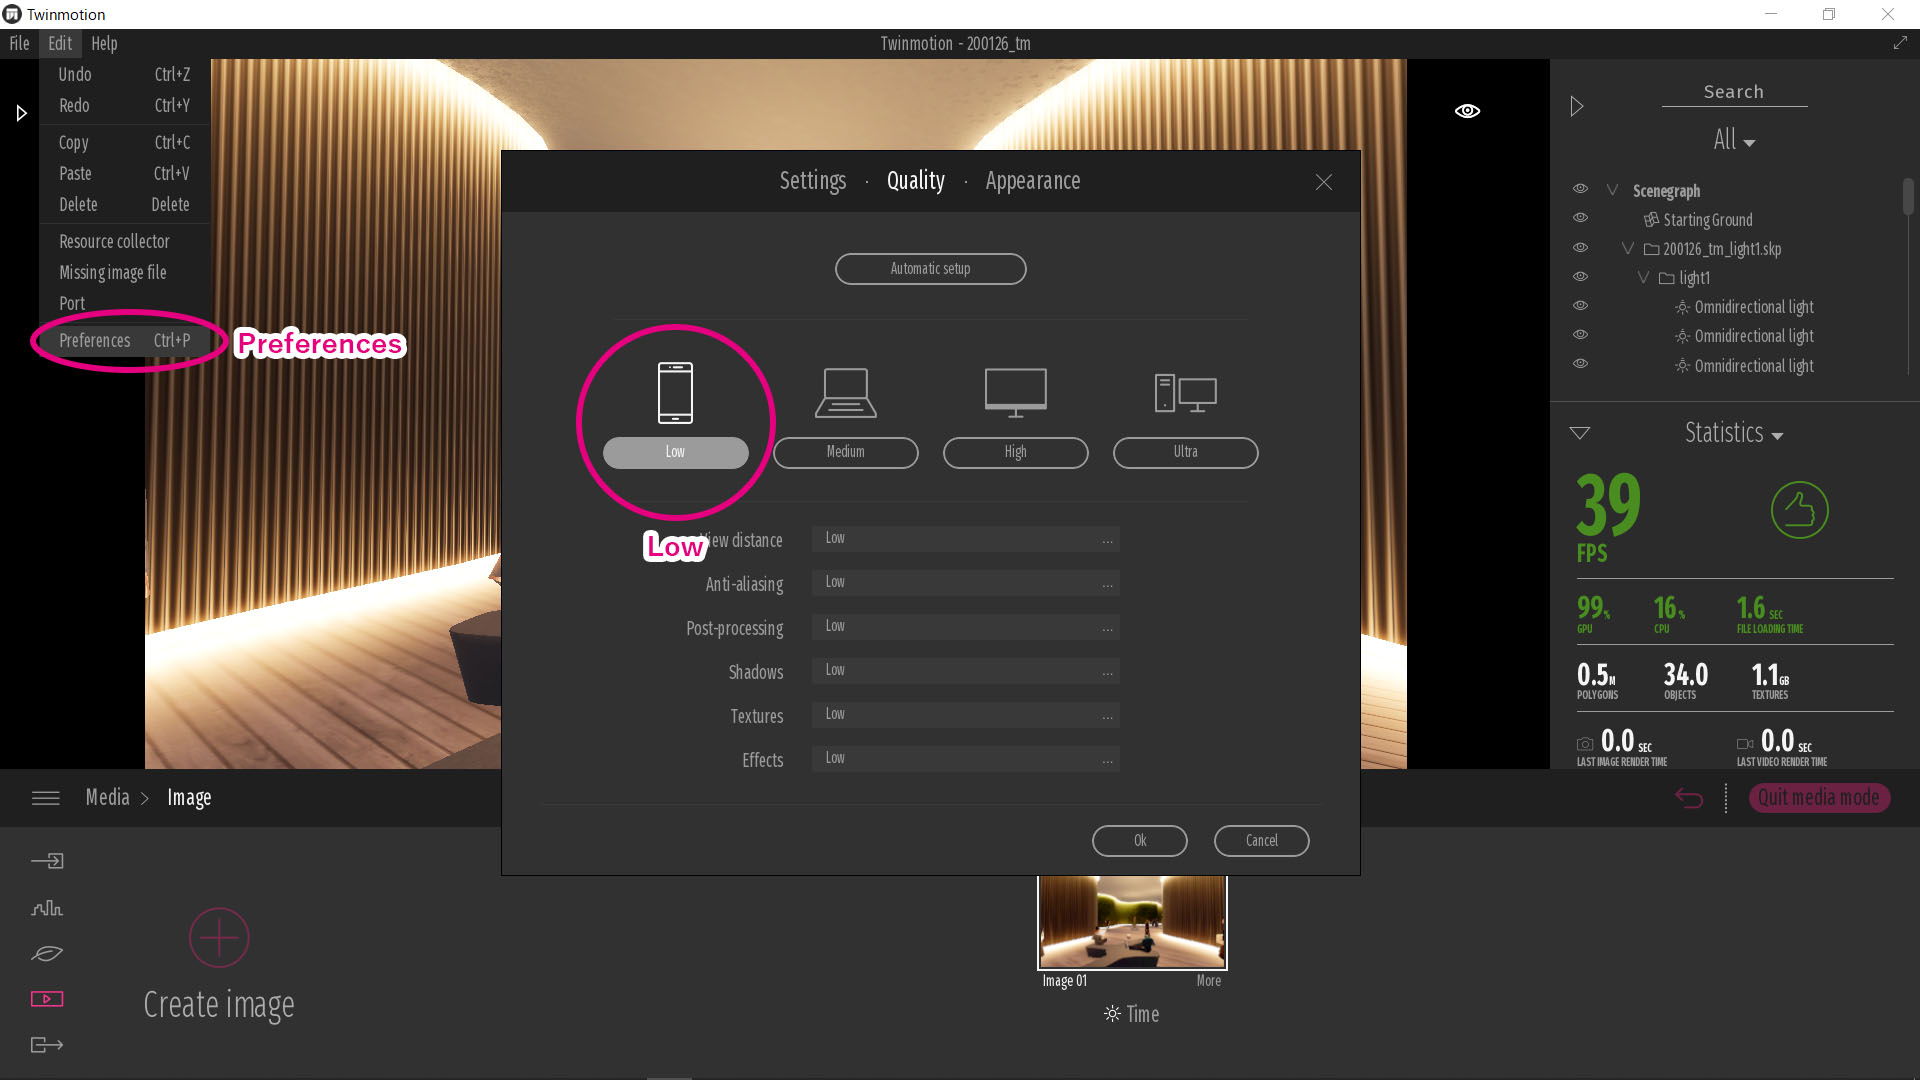
Because of increasing many light objects, culculation cost becomes very high. If your computer becomes too slow, please hide all the lights temporarily or change rendering quality low from “preferences (shortcut Ctrl+P)”. Even if you set it low, rendering quality when you export image is maintained as ultra high.
That’s all, thank you!

